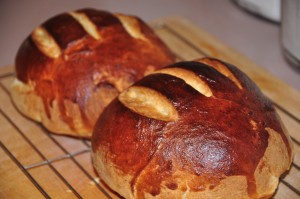
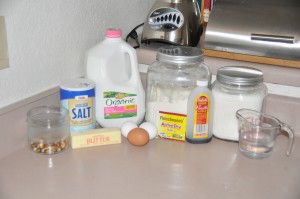
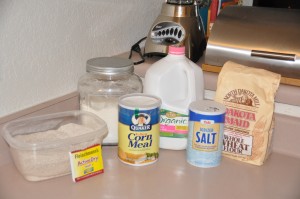
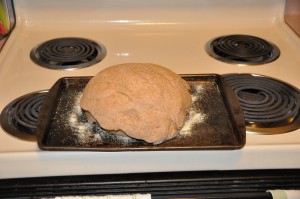
After one year and 104 recipes, I finished the Brooks Bakes Bread Project on March 27, 2012. You can still find me baking and cooking at my new blog, Tangled Up In Food.

Raised Doughnuts, Maple Bars, and Dough Gobs
January 28, 2012

by stacy
Published on: January 28, 2012
Tags:No Tags
Comments: No Comments

“[Raised Doughnuts] are old American standards and remain hearty, delicious tidbits for breakfast or for picnics or just between meal-snacking.”

“Maple bars are one of my great weaknesses, and I must confess that even now when I go to a bakery and see those luscious rectangles of fried dough with a maple glaze on them I am tempted to indulge and often do.”

“On Nantucket there used to be, and may still be for all I know, a summer hotel where on Wednesdays, Fridays, and Sundays one could go and have dough gobs for breakfast.  They were simply marvelous.”

-James Beard, Beard on Bread

Raised Doughnuts, Maple Bars, and Dough Gobs all use the same dough recipe; the only difference is the shape and the glaze in the case of Maple Bars.  Since there is a limit to how much fried dough Mike and I can eat, I made one batch of dough, divided it into thirds, and used each portion for a different recipe.

Here are the ingredients:

Raised Doughnuts, Maple Bars, and Dough Gobs Ingredients

Last night, I mixed up the dough, kneaded it lightly, and put it in the refrigerator to rise overnight.

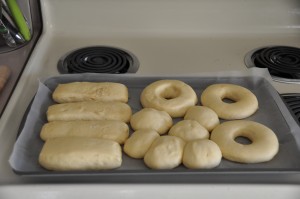
This morning, I rolled out my dough and cut out a few doughnuts, some rectangles for the Maple Bars, and formed the rest into gobs.  Then, I placed them on a cookie sheet lined with wax paper (as advised by the recipe) to rise for about an hour.

Raised Doughnuts, Maple Bars, and Dough Gobs After Second Rising

I ran into a major snag when I attempted to remove my dough from the wax paper: it was stuck.  After several minutes of frustrating salvage attempts, I gave up, scraped all of the dough off, and re-formed my shapes.  My advice is to skip the wax paper entirely and let the dough rise on a heavily floured board.

Heeding the lesson learned from Bunuelos, I was careful to monitor my oil temperature as I fried my various pastries.  My results weren’t as aesthetically pleasing as I had hoped, but I was able to make some passable Raised Doughnuts, Maple Bars, and Dough Gobs.

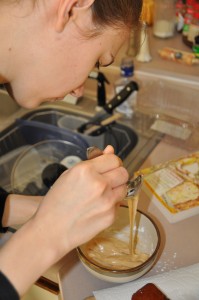
While I let the pastries drain on paper towel, I mixed up half a recipe of a maple glaze using 1/2 cup of powdered sugar and about 3 tablespoons of real maple syrup.

Mixing Maple Glaze

Raised Doughnuts:

Raised Doughnuts

Maple Bars:

Maple Bars

Dough Gobs:

Dough Gobs

These recipes taught me that there is a functional advantage to the hole in the center of a doughnut: it ensures that the pastry cooks evenly.  Both the Maple Bars and the Dough Gobs were overdone on the outside, but still slightly doughy on the inside.  Only the Raised Doughnuts cooked to perfection, inside and out.  If I make doughnuts again, I would make them doughnuts shaped, but use the delicious maple glaze on top.

Bunuelos
January 28, 2012

by stacy
Published on: January 28, 2012
Categories: Bunuelos, Fried Cakes
Tags:No Tags
Comments: No Comments

“Similar forms of this deep-fried pastry are found in Europe and Latin America…This version comes from Mexico.”
-James Beard, Beard on Bread

I have never deep-fried anything in my life.  I am more likely to eat a salad than French fries, a bagel over a doughnut.  But there is a “Fried Cakes” section in Beard on Bread, so on Thursday I embarked on a new culinary adventure.

I decided to start with Bunuelos because they looked to be the simplest of the fried cakes.  In a rush of confidence after a particularly invigorating 5K run on the treadmill, I started baking at 9 pm on a work night.

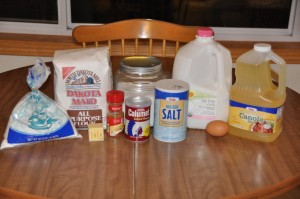
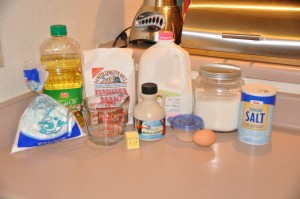
Here are the ingredients:

Bunuelos Ingredients

I halved the recipe to yield about 16 Bunuelos.

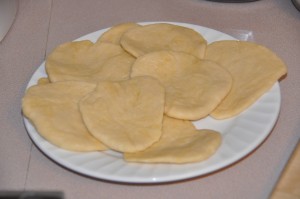
I mixed the ingredients together to form a stiff dough, and then kneaded until it reached a smooth texture.  Next, I divided the dough into 16 pieces and rolled each out into an approximation of a circle, about 1/4 inch thick.  Now for the hard part: frying in oil.

Bunuelos Before Frying

I heated my canola oil up to what I though was the right temperature, judging by the fact that the mercury on my candy thermometer had surpassed “doughnut” (370 degrees Fahrenheit) and was off the chart.  Why I thought this was the right temperature isn’t clear to me anymore.  Maybe my logic was the hotter the better.  Anyway, I placed two of the Bunuelos in the oil.  Then the oil started smoking, a little at first, then a bit more, then before I knew it, black smoke had filled the kitchen and my eyes were burning.  I had the intelligence to take the pot of oil off of the burner (my only redeeming moment of the whole debacle).  Mike looked up “frying in oil” on his tablet while I opened all the windows.

“It’s a good thing you took the oil off of the burner when you did,” said Mike, “because once the oil gets 30 degrees hotter than the smoke point, it bursts into flames.”

At this point, it was 9:30 at night, we had to wake up for work at 6 am the next morning, our house was filled with smoke:

Kitchen Filled with Smoke

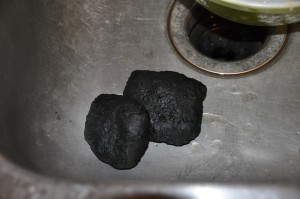
and my only two cooked Bunuelos looked like this:

Charred Bunuelos

But something (stubbornness?  my type-A personality?  a longing for fried dough?) made me heat up some more oil, carefully monitoring the temperature this time.  I had to constantly adjust the burner temperature to keep the oil at a steady 370 degrees.  But I was able to fry up some fairly nice looking Bunuelos, which I let drain on paper towel and sprinkled with powdered sugar and cinnamon.

Bunuelos

Bunuelos are really, really good.  They are deliciously fried and crispy on the outside, with a wonderfully soft center.  I have to agree with Beard–they are  “absolutely marvelous.”


Oatmeal Bread with Cooked Oatmeal
January 22, 2012

by stacy
Published on: January 22, 2012
Tags:No Tags
Comments: No Comments

“There are two or three favorite recipes for oatmeal bread in this country.  I first encountered this one in Nevada, in a restaurant that was made famous by Lucius Beebe, and it was so good that I extracted the recipe from the owner and have been using it for many years.”
-James Beard, Beard on Bread

After my disappointing Quick Fruit Bread candied pineapple experiment, I wanted to try another breakfast-type bread.  The recipe for Oatmeal Bread with Cooked Oatmeal can be found on the James Beard Foundation’s website.

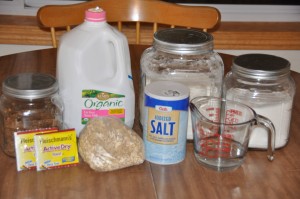
Here are the ingredients:

Oatmeal Bread with Cooked Oatmeal Ingredients

The recipe calls for “coarse rolled oats.”  My grocery store bulk bins had regular old-fashioned oatmeal, and something called “thick cut” old-fashioned oatmeal.  To the naked eye, they looked the same.  I used the thick cut oats, which seemed to work out.

I started by cooking my oatmeal.  While it cooled, I mixed together the rest of my ingredients (except for the flour).  After adding the cooked oatmeal to the mixture, I stirred in four cups of flour.

I live in Minnesota, which has very dry winters.  In recent months, I have been able to drip-dry jeans in two hours, and our bedroom humidifier is pumping a gallon of water into the air each day.  Since my house–everything in it–is so dry, I didn’t need to add any additional four to my dough during kneading to get it to the right consistency (Beard notes that you may have to add up to an extra cup).  My flour soaked up the liquid in the mixture like a sponge.

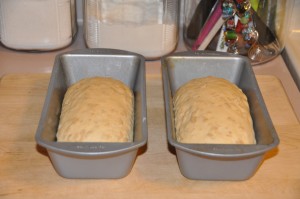
I let the dough rise for about an hour, and then kneaded it for a few more minutes and shaped it into loaves to fit my 8 x 4 loaf pans.  I like making recipes that allow me to use 8 x 4 pans since I find the resulting loaves cuter than those from 9 x 5 pans.  The fact that I have started to find loaves of bread to be “cute” slightly concerns me, especially since I have two more months to go on this project.  Who knows what my state of mind will be by then.

Oatmeal Bread with Cooked Oatmeal After Second Rising

Anyway, I let the cute loaves rise for about 45 minutes, and then baked them at 375 degrees for 45 minutes.  Since my loaves were getting quite browned by that point, I skipped the recipe step of removing the loaves from their pans and baking for a few additional minutes.

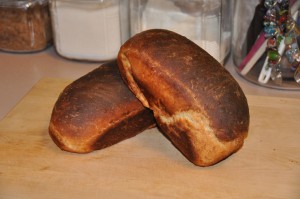
Oatmeal Bread with Cooked Oatmeal

Texturally, I enjoyed the crusty, dense, and moist Oatmeal Bread with Cooked Oatmeal.  The problem was the taste: I found it be rather bland, not rich and full flavored as Beard asserts.  I used dark brown sugar, as specified by the recipe, so that wasn’t the issue.  I think that I was hoping for a more pronounced “oat-y” flavor, which this loaf didn’t provide.

Oatmeal Bread with Cooked Oatmeal

Quick Fruit Bread
January 20, 2012

by stacy
Published on: January 20, 2012
Tags:No Tags
Comments: No Comments

“This can be made with either candied orange or chopped marinated prunes, or a combination of both…It is an excellent gift bread, makes pleasant toast, and keeps well.”
-James Beard, Beard on Bread

I couldn’t track down any candied orange, and know from Prune Bread that I hate prunes, so I used candied pineapple to make my Quick Fruit Bread.

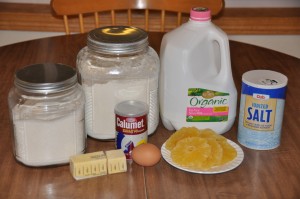
Here are the ingredients:

Quick Fruit Bread Ingredients

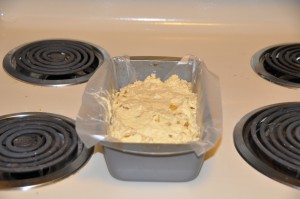
Since this is a baking powder bread, all I had to do was chop up the pineapple, melt the butter, mix everything together, and pour the batter into a 9 x 5 loaf pan.

Quick Fruit Bread Before Baking

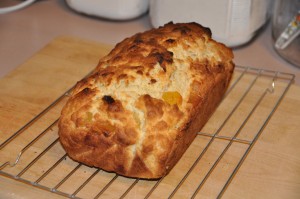
After 47 minutes at 375 degrees, the bread was done as gauged by my cake tester.

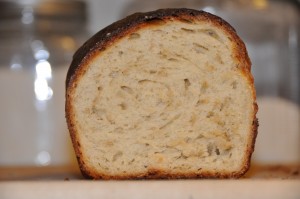
Quick Fruit Bread

Quick Fruit Bread tastes like a baking powder biscuit studded with chunks of whatever fruit you happen to use.  I discovered that I like candied pineapple about as much as I like prunes, so it wasn’t much of a hit with me.  Mike thought that it was good.  Since I deviated from the recipe in a pretty major way, I don’t feel like I can pass judgement on it one way or the other.  However, I do think that I would have enjoyed it more if I had used either the candied orange called for, or dried apples and some cinnamon.

Refrigerator Potato Bread
January 14, 2012

by stacy
Published on: January 14, 2012
Tags:No Tags
Comments: No Comments

“The potato and butter in this loaf give it a distinctive, very pleasant flavor…it is nice for sandwiches or toast or as a breakfast or tea bread, and is reminiscent of breads that used to be common in the nineteenth century.”
-James Beard, Beard on Bread

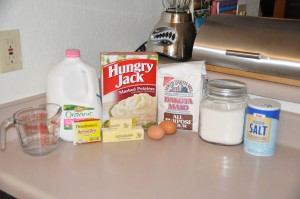
I continued my bread-with-mashed-potatoes kick today with Refrigerator Potato Bread.  The recipe can be found on the James Beard Foundation’s website.

Here are the ingredients:

Refrigerator Potato Bread Ingredients

Refrigerator Potato Bread is so named because its first rising is done overnight in the refrigerator.  Last night, I mixed up my dough (I had to use an extra 1/2 cup of flour, 6 1/2 cups total, to get the right consistency), kneaded it up, and placed it in a buttered bowl covered with plastic wrap in the refrigerator.

This morning, after a leisurely breakfast (I love Saturdays!) I pulled my dough out of the refrigerator and let it warm up for about 10 minutes.  Then, I kneaded it for a second time.  The dough was still cold and stiff from its night in the fridge, so kneading involved more manhandling than fluid technique.

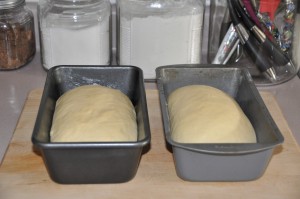
I shaped the dough into loaves to fit in my 9 x 5 loaf pans, and let them rise for 3 hours.  Since I was starting with cold dough, I wanted to allow ample time for the second rising.

Refrigerator Potato Bread After Second Rising

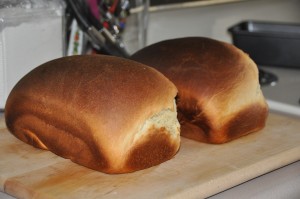
After 40 minutes in the oven at 375 degrees, the bread was ready in time for lunch (Fresh baked bread for lunch is another reason to love Saturdays).

Refrigerator Potato Bread

Both of the loaves cracked on one side during baking; I think that if I had made some cuts in the top that would have prevented it.

Mike and I both thought Refrigerator Potato Bread was delicious.  It was somehow fluffy and moist at the same time, with a nice balance of flavors from the butter, potatoes, sugar, and salt.  We’re looking forward to making some paninis tomorrow night.


Moravian Coffee Cake
January 12, 2012

by stacy
Published on: January 12, 2012
Tags:No Tags
Comments: No Comments

“This is typical of the medium-sweet, yeasty coffee cakes that one finds in Pennsylvania and other parts of the country where Moravian groups have settled…I recommend it highly.”
-James Beard, Beard on Bread

After days of sandwiches, we finally polished off the Italian Holiday Bread and Pullman Loaf, and it was time to make more bread last night.  Since I’m trying to work my way through the rest of the sweet breads, and happened to have some instant mashed potatoes on hand, I settled on Moravian Coffee Cake.  (Also, I should get bonus points for correctly identifying Moravia as part of what is now the Czech Republic.  I do have moments when I feel like I could win some serious money on Cash Cab.)

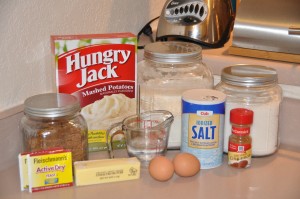
Here are the ingredients:

Moravian Coffee Cake Ingredients

I attempted to mix the ingredients using an electric mixer, as instructed by the recipe.  However, my electric mixer is a little hand held model: great for mixing cake batter, but not very effective at mixing a thick bread dough.  I resorted to my favorite wooden spoon (yes, I do actually have a favorite spoon) to mix in most of the flour, and incorporated the rest during kneading.

After a first rising of about 45 minutes, I rolled the dough into rectangles to fit my 9 x 5 pans.  I sprinkled each loaf a mixture of brown sugar and cinnamon and then drizzled with melted butter.  The recipe calls for an entire stick of melted butter.  Since there was already one stick of butter in the bread dough, and I am not as avid a member of the butter fan club as James Beard, I only used half a stick of melted butter.  I think that a whole stick would have been overkill–most of the butter would have slid right off the dough anyway.

Moravian Coffee Cake After Second Rising

I let the loaves rise for another 45 minutes, and then popped them in the oven for 30 minutes at 350 degrees, after which the house smelled like a giant cinnamon roll.

Moravian Coffee Cake

In the interests of quality control, I sampled some Moravian Coffee Cake right out of the oven.  It is a very unique bread texturally, with a spongy, moist center and a crisp, struesel-like top crust.  The bread itself has just a hint of sweetness, with most of the flavor coming from the topping.  Beard includes a recipe for an icing to drizzle over the cake, but the top is so sweet already that I think the icing would be too much.

Moravian Coffee Cake

Note: Mike thought that this recipe would be better if the bread was sweetened with honey.  To me, the combination of honey, brown sugar, and cinnamon seems strange, but it might be an interesting experiment.


Pullman Loaf or Pain de Mie
January 10, 2012

by stacy
Published on: January 10, 2012
Tags:No Tags
Comments: No Comments

“This is the white bread frequently used for sandwiches, a four-square loaf that has delicate texture, a fine crumb, and good flavor.”
-James Beard, Beard on Bread

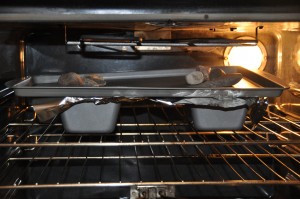
One of the tricky parts of the Brooks Bakes Bread project is finding substitutes for specialty baking equipment.  I have a small kitchen, so I don’t have the storage space to accumulate extra gadgets.  I have successfully used a slow cooker liner as a souffle mold, but was less successful when I attempted to use tuna cans for crumpet rings.  I have been brainstorming for awhile to come up with something to use in place of a Pullman tin, a bread pan with a sliding lid so that you get a square-shaped loaf.  With some brainstorming help from Mike, I set up a “Pullman tin” made up of regular bread pans covered with greased aluminum foil, weighted with a baking sheet and landscaping rocks I borrowed from the front of our apartment complex.  After figuring out my equipment, it was time to mix up the dough.

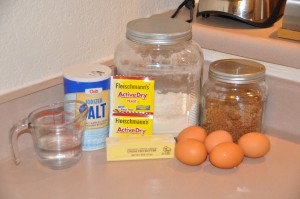
Here are the ingredients:

Pullman Loaf Ingredients

There was something very satisfying about kneading up this dough.  Beard’s recipe instructs you to “work it [the dough] hard for a good 10 minutes: slap it, beat it, punch it…” I did with gusto.

After a first rising of about 45 minutes, I kneaded the dough again for a few minutes and let it rise for another 45 minutes.  After the second rising, I shaped the dough into loaves to fit my 8 x 4 loaf pans and let the dough rise for another 30 minutes.  Finally, it was time to set up my loaves in the oven:

Pullman Loaf in Oven

I baked the loaves at 375 degrees for 35 minutes and then removed the loaves from the pans and baked them for an additional few minutes.

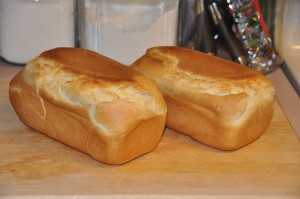
Pullman Loaf

My improvised Pullman Loaf tin didn’t quite give me a square loaf: the rocks weren’t heavy enough, and I had too much dough for the size of pans.  However, my Pullman Loaf was still absolutely delicious: incredibly light and buttery, with a flaky crust that was reminiscent of a saltine cracker.  When I get a better kitchen, I might even invest in a Pullman tin.

Italian Holiday Bread
January 7, 2012

by stacy
Published on: January 7, 2012
Tags:No Tags
Comments: No Comments

“This is a rather sweet brioche-type bread, exceedingly light and baked free form.”
-James Beard, Beard on Bread

On Thursday night, I made the last of the Egg Breads: Italian Holiday Bread.  It was a good weeknight recipe, because it only requires one rising.

Here are the ingredients:

Italian Holiday Bread Ingredients

This is a recipe that does the Egg Bread chapter justice–two whole eggs, three egg yolks, and then an additional egg yolk (egg not pictured) for the glaze.

I found that the amount of butter (one stick to four cups of flour) yielded a very clay-like dough that was difficult to knead and shape into loaves.  I finally resorted to rolling the dough into two circles with rolling pin and then pulling the edges together to form a round loaf.

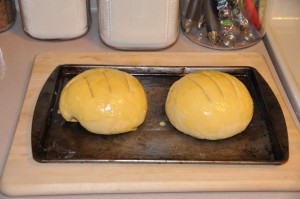
After nearly two hours of rising time, I brushed the loaves with an egg yolk, water, flour, and sugar mixture and made a few artistic cuts in the top.

Italian Holiday Bread Before Baking

I pulled the loaves out after 30 minutes at the oven at 325 degrees.  Only after cutting into the loaves did I discover a very small doughy portion in the center of one, and the other was baked through.  I still struggle with the occasional under-baked free-form loaf, especially since they both sounded hollow when I rapped them with my knuckles.
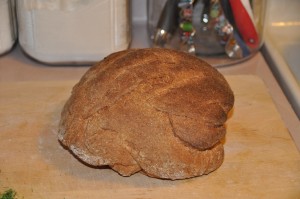
Italian Holiday Bread

Italian Holiday Bread wasn’t at all what I was expecting.  From Beard’s description, I imagined a light, sweet bread.  In actuality, the texture was heavier (closer to Brioche Bread than Water-Proofed Bread) and was very slightly sweetened.

Since I like lighter breads, Italian Holiday Bread isn’t an egg bread that I would make again.  However, it did provide me with some good experience shaping free-form loaves.

Water-Proofed Egg Twists
January 1, 2012

by stacy
Published on: January 1, 2012
Tags:No Tags
Comments: No Comments

“These are delicious little sweet buns that lend themselves to many variations.  They are great fun to prepare, have extraordinary taste, look charming, and can be frozen and reheated with great success.”
-James Beard, Beard on Bread

Continuing on my Egg Breads kick, I decided to make Water-Proofed Egg Twists for tea today.  I am still cleaning dough off the towel I used to make Water-Proofed Bread, so I asked some more experienced bakers if there was any benefit to the whole wrapping dough in a towel and submerging it for its first rising.  No one could come up with any good reasons to wreck another one of my kitchen towels (or had even heard of water-proofing), so I decided to let my dough rise on dry land.

Backing up a step, here are my ingredients:

Water-Proofed Egg Twists Ingredients

After mixing the dough ingredients together, I turned the still-sticky dough onto a floured cutting board.  Using Beard’s genius suggestions (why did I never think of this?) I worked in some flour with a spatula until the dough could be kneaded by hand.  Instead of water-proofing, I let the dough rise for about 40 minutes in a greased bowl.

Next, I divided the dough into 16 approximately equal sections.  I rolled each into a cylinder and then rolled it in a sugar-chopped walnut mixture.  Then I joined the ends together and twisted the dough.  Some of my twists turned out better than others.

Water-Proofed Egg Twists After Second Rising

After another 45 minutes of rising, I baked the twists at 375 degrees for fifteen minutes, rotating the baking sheets halfway through.

Water-Proofed Egg Twists

Water-Proofed Egg Twists are a delicious little sweet bread.  The texture is light and fluffy on the inside, with a hint of sweetness and crunch from the crystallized sugar and walnut coating.  Skipping the water-proofing step doesn’t seem to impact the texture, so you don’t have to suffer through dough-encrusted kitchen towels.  Overall, my non-water-proofed Egg Twists were a sophisticated and tasty tea time snack.

Water-Proofed Egg Twists

Norwegian Whole-Wheat Bread
December 30, 2011

by stacy
Published on: December 30, 2011
Tags:No Tags
Comments: No Comments

“Taught in the Norwegian Government School for Domestic Science Teachers in Oslo, this recipe makes a very dense, coarse bread full of honest flavor…”
-James Beard, Beard on Bread

Since I am only baking for myself and Mike, rather than a family of 6 plus a hired man, I halved the ginormous Norwegian Whole-Wheat Bread recipe.

Stacy’s Downsized Norwegian Whole-Wheat Bread
Variation on Norwegian Whole-Wheat Bread from Beard on Bread

Ingredients:

1 package active dry yeast
2 cups warm milk (110 degrees Fahrenheit)
3 – 3 1/2 cups whole-wheat flour
1 cup rye flour
1 cups all-purpose flour
1 tablespoon salt
Cornmeal

Norwegian Whole-Wheat Bread Ingredients

In large mixing bowl, proof yeast in 1/4 cup of the warm milk.  Add remaining milk and salt.  Gradually mix in flours.  Turn dough onto a lightly floured board and knead.  The dough will be very stiff and difficult to work with.  As an analogy, my typical bread dough is the texture of Play-Doh: very pliable and easy to work with.  This dough will be the texture of the clay you struggled with in seventh grade art class.

After kneading the dough until it is a somewhat workable texture, place in a greased bowl and let rise until doubled in bulk (this took about one hour for me).  Punch down and attempt to shape dough into a free-form round loaf.  Hopefully, you will have more success than I did.  Place loaf on baking sheet sprinkled with cornmeal and let rise until doubled in bulk (again, this took one hour for me).

At this point, it was fairly apparent that my loaf shaping skills would not have earned high marks at the Norwegian Government School for Domestic Science Teachers:

Norwegian Whole-Wheat Bread After Second Rising

One gold star if your loaf looks better than mine.  If not, that’s life.  Make a few cuts in the loaf’s surface and bake in a preheated 375 degree oven for 50 minutes or until loaf is hollow-sounding when rapped with your knuckles.

Norwegian Whole-Wheat Bread

I picture Norwegian Whole-Wheat Bread as something that you cook in a wood stove and serve to the men when they come in from the fields.  It is a very crusty, dense loaf with more of a rye than a whole-wheat flavor.  This is a bread that could plow a field with a team of oxen and then fell a few trees.  However, if you live a more suburban existence, I can also attest to Norwegian Whole-Wheat Bread pairing nicely with Chicken with Mustard-Dill sauce.

page 3 of 11

104


0

Loaves baked   Loaves to go
About the Baker
I'm a paralegal living and working in the Minneapolis-St. Paul metro area. Besides baking, blogging, and eating bread, I love knitting and enjoying the Minnesota outdoors. My husband, Mike, is the Brooks Bakes Bread website developer, bread photographer, and chief taste tester.
October 2023
S M T W T F S
« Mar    
1234567
891011121314
15161718192021
22232425262728
293031  
Recent Comments

Welcome , October 14, 2023