After one year and 104 recipes, I finished the Brooks Bakes Bread Project on March 27, 2012. You can still find me baking and cooking at my new blog, Tangled Up In Food.

Categories: Egg Breads

Italian Holiday Bread
January 7, 2012

by stacy
Published on: January 7, 2012
Tags:No Tags
Comments: No Comments

“This is a rather sweet brioche-type bread, exceedingly light and baked free form.”
-James Beard, Beard on Bread

On Thursday night, I made the last of the Egg Breads: Italian Holiday Bread.  It was a good weeknight recipe, because it only requires one rising.

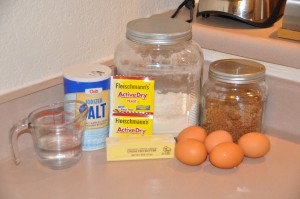
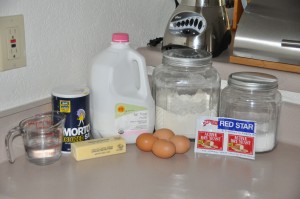
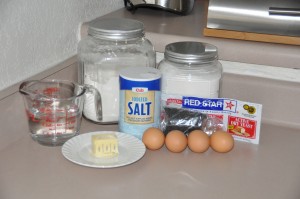
Here are the ingredients:

Italian Holiday Bread Ingredients

This is a recipe that does the Egg Bread chapter justice–two whole eggs, three egg yolks, and then an additional egg yolk (egg not pictured) for the glaze.

I found that the amount of butter (one stick to four cups of flour) yielded a very clay-like dough that was difficult to knead and shape into loaves.  I finally resorted to rolling the dough into two circles with rolling pin and then pulling the edges together to form a round loaf.

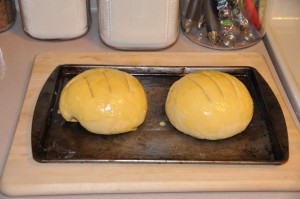
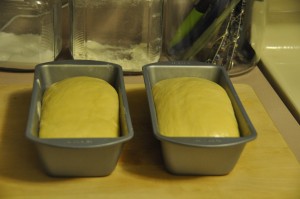
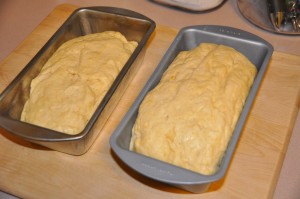
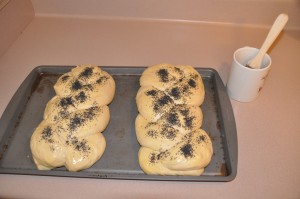
After nearly two hours of rising time, I brushed the loaves with an egg yolk, water, flour, and sugar mixture and made a few artistic cuts in the top.

Italian Holiday Bread Before Baking

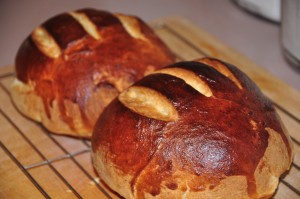
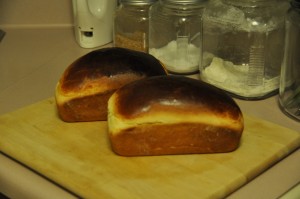
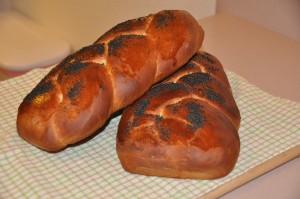
I pulled the loaves out after 30 minutes at the oven at 325 degrees.  Only after cutting into the loaves did I discover a very small doughy portion in the center of one, and the other was baked through.  I still struggle with the occasional under-baked free-form loaf, especially since they both sounded hollow when I rapped them with my knuckles.

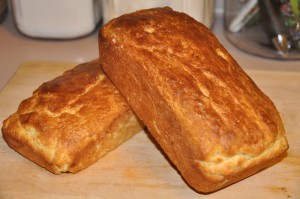
Italian Holiday Bread

Italian Holiday Bread wasn’t at all what I was expecting.  From Beard’s description, I imagined a light, sweet bread.  In actuality, the texture was heavier (closer to Brioche Bread than Water-Proofed Bread) and was very slightly sweetened.

Since I like lighter breads, Italian Holiday Bread isn’t an egg bread that I would make again.  However, it did provide me with some good experience shaping free-form loaves.

Water-Proofed Egg Twists
January 1, 2012

by stacy
Published on: January 1, 2012
Tags:No Tags
Comments: No Comments

“These are delicious little sweet buns that lend themselves to many variations.  They are great fun to prepare, have extraordinary taste, look charming, and can be frozen and reheated with great success.”
-James Beard, Beard on Bread

Continuing on my Egg Breads kick, I decided to make Water-Proofed Egg Twists for tea today.  I am still cleaning dough off the towel I used to make Water-Proofed Bread, so I asked some more experienced bakers if there was any benefit to the whole wrapping dough in a towel and submerging it for its first rising.  No one could come up with any good reasons to wreck another one of my kitchen towels (or had even heard of water-proofing), so I decided to let my dough rise on dry land.

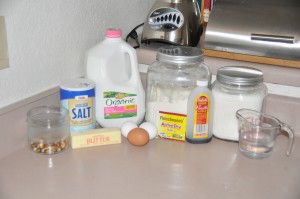
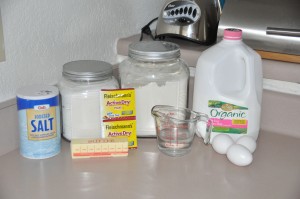
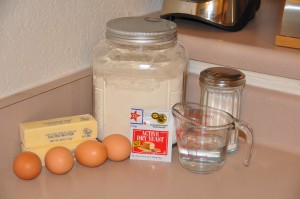
Backing up a step, here are my ingredients:

Water-Proofed Egg Twists Ingredients

After mixing the dough ingredients together, I turned the still-sticky dough onto a floured cutting board.  Using Beard’s genius suggestions (why did I never think of this?) I worked in some flour with a spatula until the dough could be kneaded by hand.  Instead of water-proofing, I let the dough rise for about 40 minutes in a greased bowl.

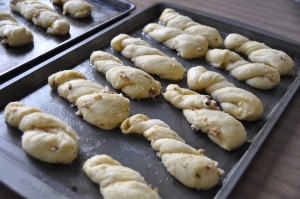
Next, I divided the dough into 16 approximately equal sections.  I rolled each into a cylinder and then rolled it in a sugar-chopped walnut mixture.  Then I joined the ends together and twisted the dough.  Some of my twists turned out better than others.

Water-Proofed Egg Twists After Second Rising

After another 45 minutes of rising, I baked the twists at 375 degrees for fifteen minutes, rotating the baking sheets halfway through.

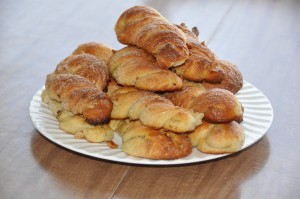
Water-Proofed Egg Twists

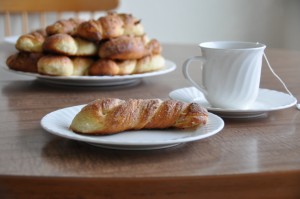
Water-Proofed Egg Twists are a delicious little sweet bread.  The texture is light and fluffy on the inside, with a hint of sweetness and crunch from the crystallized sugar and walnut coating.  Skipping the water-proofing step doesn’t seem to impact the texture, so you don’t have to suffer through dough-encrusted kitchen towels.  Overall, my non-water-proofed Egg Twists were a sophisticated and tasty tea time snack.

Water-Proofed Egg Twists

Water-Proofed Bread
December 28, 2011

by stacy
Published on: December 28, 2011
Tags:No Tags
Comments: No Comments

“Although the dough in this recipe is fairly difficult to handle, it makes a very delicate, briochelike bread with a rich, buttery, eggy taste…The bread is called ‘water-proofed’ because the dough is submerged in a bath of water for the first rising.”
-James Beard, Beard on Bread

The holidays are over, I have the week off work, and it’s time to get caught up with the Brooks Bakes Bread project.  My goal is to finish all of the loaves in one year, which gives me until March 27 to bake 32 more loaves.

I decided to try Water-Proofed Bread today because it looked complicated, and I had the whole day to work on it.  Luckily, I didn’t need it (especially since I had to catch up on laundry after our Christmas trip to Colorado).

Here are the ingredients:

Water-Proofed Bread Ingredients

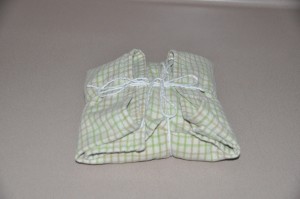
The dough was fairly difficult to handle, because it was so soft and sticky.  I followed Beard’s suggestion and used a spatula to help me knead in additional flour until the dough was easy enough to handle.  After a bit more kneading, it was time for the unusual step of placing the dough on a towel, wrapping it up, and submerging it in a bowl of warm water for the first rising.  Beard doesn’t spell out what, exactly, is accomplished by this klutziness.

Water-Proofed Bread Before First Rising

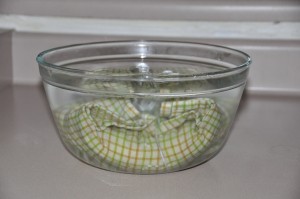
The dough started out sunk to the bottom of the bowl:

Water-Proofed Bread Before First Rising

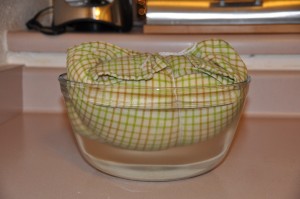
And after half an hour had risen enough to float to the top:

Water-Proofed Bread Afer First Rising

I unwrapped my dough package to discover a sticky mass of dough adhered to a towel.  After scrapping the dough off, I added more flour and shaped it into two loaves.  Based on the volume of my loaves, I used 8 x 4 loaf pans instead of the 9 x 5 loaf pans called for by the recipe.

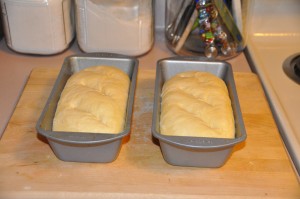
After another 45 minutes of rising, I brushed the loaves with cold water and made some diagonal slits in the tops.

Water-Proofed Bread After Second Rising

I baked the loaves at 375 degrees for 20 minutes until they were browned, then removed the loaves from the pans and baked them on the oven racks for an additional two minutes to crisp the crust.

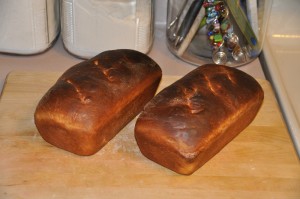
Water-Proofed Bread

Water-Proofed Bread was my favorite recipe from the Egg Breads section to date.  It has a fluffy texture with flaky crust, and subtly buttery flavor.  I’m not sure what the whole water-proofing step actually does for you, but the end result was tasty.


County Fair Bread
October 29, 2011

by stacy
Published on: October 29, 2011
Tags:No Tags
Comments: No Comments

“When well made, this slightly sweet braided loaf looks exactly as if it would win first prize at the fair.”
-James Beard, Beard on Bread

Thanks to a very hectic week full of knitting, house hunting, yoga, and even a nightime Halloween tour of the state capitol, I am finally posting now (the wee hours of Saturday morning) about a recipe I made last Sunday.

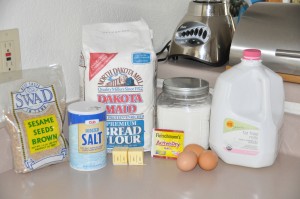
Here are the ingredients:

County Fair Bread Ingredients

I used hard wheat, or bread, flour instead of all-purpose.  I found the massive bag of sesame seeds in the Indian foods section of the grocery store–it was more cost effective than the little bags of sesame seeds over in the spice section, although I now have huge bag of sesame seeds in my pantry.

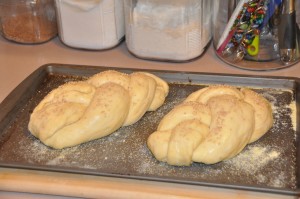
The bread kneaded up nicely.  My rising times were a bit on the long side, an hour and a half each for the first and second risings.  I did a decent job of braiding my dough into loaves, and they looked downright impressive once I had sprinkled on the sesame seeds (in a surprisingly even fashion for once).

County Fair Bread After Second Rising

Because I don’t share Beard’s love affair with all things butter, I sprinkled the baking sheet with cornmeal instead of buttering it to prevent my loaves from sticking.

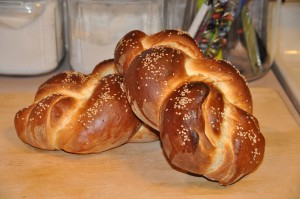
The loaves rose substantially during baking time, and were finished after what I think was 30 minutes in the oven (the details are starting to get foggy after almost a week).

County Fair Bread

I don’t think that my loaves were quite up to first prize at the county fair standards, but hopefully I would get an honorable mention.  County Fair Bread has a nice texture and flavor; however, it isn’t sweet at all (despite Beard’s claims).  The sesame seeds are a nice touch and add a more complex flavor to the bread.  On the downside, County Fair Bread goes stale within a day, but the stale bread still makes wonderful toast.

I liked this recipe more than James Beard’s Challah recipe.  However, my favorite egg bread recipe is still the Rich Egg Bread Recipe from the Betty Crocker cookbook.  Some of it might be sentiment on my part, since it was the first kneaded bread recipe that I ever made.  Regardless, it does make a lovely loaf of bread.


Portuguese Sweet Bread
August 25, 2011

by stacy
Published on: August 25, 2011
Tags:No Tags
Comments: No Comments

“This recipe makes a delicate, spongy bread that is a delight.  It has fine crumb and is excellent for breakfast or tea.”
-James Beard, Beard on Bread

Mike and I have been busy enjoying some amazing Minnesota end-of-summer weather, so I am behind in posting.  On Tuesday, I made Portuguese Sweet Bread.

Here are the ingredients:

Portuguese Sweet Bread Ingredients

This recipe yields a very sticky dough.  I had to add quite a bit of extra flour while kneading, along with using a rubber scraper to get the dough unstuck from my kneading surface.  Despite the two packages of yeast, it took two hours of rising time for my dough to double in bulk.

Since I don’t have the 9-inch skillets called for in the recipe to bake round loaves, I used the alternative option and shaped the dough into loaves to fit in my 8 x 4 bread pans.  I made the mistake of trying to roll out my dough on an unfloured surface and had to repeat the process of scraping it up.  After another hour of rising, my loaves were ready to go in the oven.

Portuguese Sweet Bread After Second Rising

After only 25 minutes in the oven at 350 degrees, the loaves had risen quite a bit and were nicely browned.

Portuguese Sweet Bread

Just as Beard claims, Portuguese Sweet Bread is a delight.  It has a delicate, buttery texture with a lightness from the milk and eggs.  Really, you can’t go too far wrong using a recipe with a cup of sugar and a stick of butter.

Brioche Bread
May 20, 2011

by stacy
Published on: May 20, 2011
Categories: Brioche, Egg Breads
Tags:No Tags
Comments: No Comments

“[Brioche Bread] is a loaf that is especially good for delicate sandwiches…It is also a delicious egg bread by itself, easy to make and pleasant in flavor.”
-James Beard, Beard on Bread

For some reason, I have a hard time pronouncing the word “brioche.”  Besides a bread, it is also a knitting stitch (my other hobby) so I have lots of opportunities to  mangle the pronunciation.  Luckily, this bread is easier to make than to say.

Here are the ingredients:

Brioche Bread Ingredients

Note the two full sticks of butter (one is hidden by the eggs).  These will be important later.  Since I used salted butter, I eliminated the salt in the recipe.

Brioche is unique in that it does not require any kneading.  I simply melted the butter, mixed it with the yeast, sugar, water, eggs, and flour, and let the dough rise.  After an hour, I had to “shape into loaves.”  Fine, I thought, I’ve done this before.  Then I picked up the dough.

It was the consistency of a giant grease ball.  I pulled the oily mass into two pieces, wadded each one into an approximate loaf shape, and put them in pans to rise again.  After about 45 minutes, they had doubled in size and were ready to be baked.

Brioche Bread Before Baking

The bread was done after 25 minutes in the oven at 400 degrees.

Brioche Bread

Now, I like butter as much as the next person (see: Helen Evans Brown’s Corn Chili Bread).  However, Brioche Bread tasted more like butter with some flour mixed in than bread.  It was edible when spread with homemade jam, but I couldn’t stomach it plain.  And the idea of a slice of Brioche Bread with butter makes me feel ill.

Challah
April 6, 2011

by stacy
Published on: April 6, 2011
Categories: Challah, Egg Breads
Tags:No Tags
Comments: No Comments

Today was a somewhat frustrating day at work, plagued by computer problems. I couldn’t wait to get home, unwind, and bake some challah. I have made challah twice before, and I love everything about it–the process of braiding it, the smell as it bakes, and the delicious taste from the hint of eggs.

Here are the ingredients:

Challah Ingredients

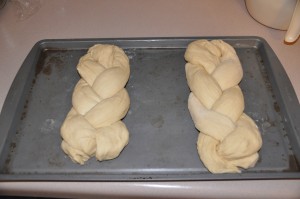
This recipe required more yeast than I have ever used, 3 packets. It does yield two loaves, but the dough seemed to rise much faster than my other challah recipe (from the Betty Crocker cookbook). Beard estimates the first rising time as 1 1/2 to 2 hours–mine was ready in only 45 minutes. I divided the dough into six not-very-equal portions with a pizza cutter. Then I spent several minutes moving bits of dough from one lump to another, moving them back again, and then holding one in each hand to try to weigh them against each other.  I recommend using a kitchen scale instead, if you’re smart enough to have one (of course, I’m not).  I finally got the portions close enough, and rolled them out and braided them.  As you can tell, one loaf ended up larger than the other due to my dough equalizing difficulties.

Challah Before Second Rising

The second rising also took 45 minutes. I brushed the loaves with egg yolk and sprinkled them with poppy seeds, unfortunately not very evenly. Tonight was not the night for consistency.

Challah After Second Rising

The amazing smell of challah started wafting through our house in less than 10 minutes. Unfortunately, I left the bread in the oven a bit too long. The recipe called for a minimum 35 minute baking time, so I set the timer for 30 minutes.  I checked on the loaves a few minutes early, but the crusts were already over-browned. The bread does still taste alright. However, my other challah recipe yields a much sweeter bread–1/4 cup of sugar is used for one loaf, compared Beard’s 1 tablespoon of sugar for 2 loaves. I like a sweeter challah, which preferably I haven’t over-baked. Tonight’s challah wasn’t a total loss, but I didn’t quite get the the results I had hoped for either.

Challah

page 1 of 1

104


0

Loaves baked   Loaves to go
About the Baker
I'm a paralegal living and working in the Minneapolis-St. Paul metro area. Besides baking, blogging, and eating bread, I love knitting and enjoying the Minnesota outdoors. My husband, Mike, is the Brooks Bakes Bread website developer, bread photographer, and chief taste tester.
October 2023
S M T W T F S
« Mar    
1234567
891011121314
15161718192021
22232425262728
293031  
Recent Comments

Welcome , October 14, 2023