After one year and 104 recipes, I finished the Brooks Bakes Bread Project on March 27, 2012. You can still find me baking and cooking at my new blog, Tangled Up In Food.

Archives: December 2011

Norwegian Whole-Wheat Bread
December 30, 2011

by stacy
Published on: December 30, 2011
Tags:No Tags
Comments: No Comments

“Taught in the Norwegian Government School for Domestic Science Teachers in Oslo, this recipe makes a very dense, coarse bread full of honest flavor…”
-James Beard, Beard on Bread

Since I am only baking for myself and Mike, rather than a family of 6 plus a hired man, I halved the ginormous Norwegian Whole-Wheat Bread recipe.

Stacy’s Downsized Norwegian Whole-Wheat Bread
Variation on Norwegian Whole-Wheat Bread from Beard on Bread

Ingredients:

1 package active dry yeast
2 cups warm milk (110 degrees Fahrenheit)
3 – 3 1/2 cups whole-wheat flour
1 cup rye flour
1 cups all-purpose flour
1 tablespoon salt
Cornmeal

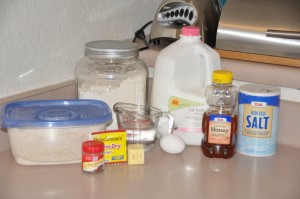
Norwegian Whole-Wheat Bread Ingredients

In large mixing bowl, proof yeast in 1/4 cup of the warm milk.  Add remaining milk and salt.  Gradually mix in flours.  Turn dough onto a lightly floured board and knead.  The dough will be very stiff and difficult to work with.  As an analogy, my typical bread dough is the texture of Play-Doh: very pliable and easy to work with.  This dough will be the texture of the clay you struggled with in seventh grade art class.

After kneading the dough until it is a somewhat workable texture, place in a greased bowl and let rise until doubled in bulk (this took about one hour for me).  Punch down and attempt to shape dough into a free-form round loaf.  Hopefully, you will have more success than I did.  Place loaf on baking sheet sprinkled with cornmeal and let rise until doubled in bulk (again, this took one hour for me).

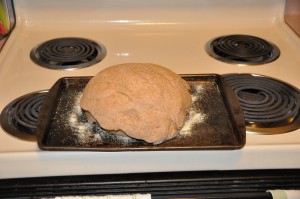
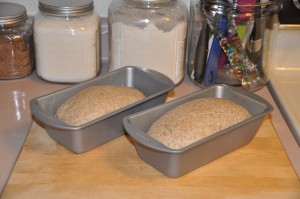
At this point, it was fairly apparent that my loaf shaping skills would not have earned high marks at the Norwegian Government School for Domestic Science Teachers:

Norwegian Whole-Wheat Bread After Second Rising

One gold star if your loaf looks better than mine.  If not, that’s life.  Make a few cuts in the loaf’s surface and bake in a preheated 375 degree oven for 50 minutes or until loaf is hollow-sounding when rapped with your knuckles.

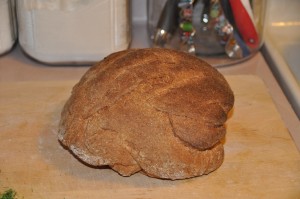
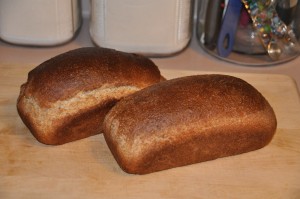
Norwegian Whole-Wheat Bread

I picture Norwegian Whole-Wheat Bread as something that you cook in a wood stove and serve to the men when they come in from the fields.  It is a very crusty, dense loaf with more of a rye than a whole-wheat flavor.  This is a bread that could plow a field with a team of oxen and then fell a few trees.  However, if you live a more suburban existence, I can also attest to Norwegian Whole-Wheat Bread pairing nicely with Chicken with Mustard-Dill sauce.

Water-Proofed Bread
December 28, 2011

by stacy
Published on: December 28, 2011
Tags:No Tags
Comments: No Comments

“Although the dough in this recipe is fairly difficult to handle, it makes a very delicate, briochelike bread with a rich, buttery, eggy taste…The bread is called ‘water-proofed’ because the dough is submerged in a bath of water for the first rising.”
-James Beard, Beard on Bread

The holidays are over, I have the week off work, and it’s time to get caught up with the Brooks Bakes Bread project.  My goal is to finish all of the loaves in one year, which gives me until March 27 to bake 32 more loaves.

I decided to try Water-Proofed Bread today because it looked complicated, and I had the whole day to work on it.  Luckily, I didn’t need it (especially since I had to catch up on laundry after our Christmas trip to Colorado).

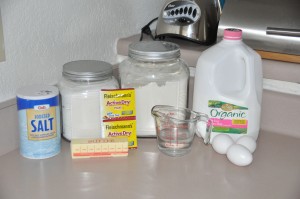
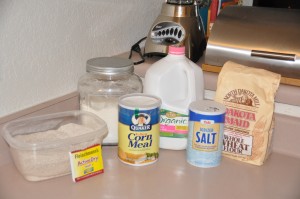
Here are the ingredients:

Water-Proofed Bread Ingredients

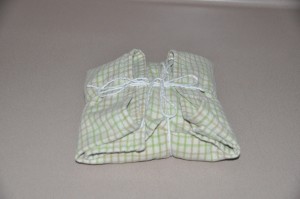
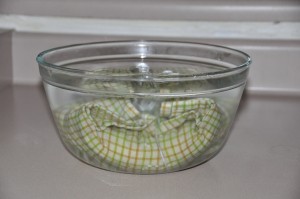
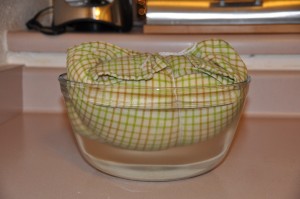
The dough was fairly difficult to handle, because it was so soft and sticky.  I followed Beard’s suggestion and used a spatula to help me knead in additional flour until the dough was easy enough to handle.  After a bit more kneading, it was time for the unusual step of placing the dough on a towel, wrapping it up, and submerging it in a bowl of warm water for the first rising.  Beard doesn’t spell out what, exactly, is accomplished by this klutziness.

Water-Proofed Bread Before First Rising

The dough started out sunk to the bottom of the bowl:

Water-Proofed Bread Before First Rising

And after half an hour had risen enough to float to the top:

Water-Proofed Bread Afer First Rising

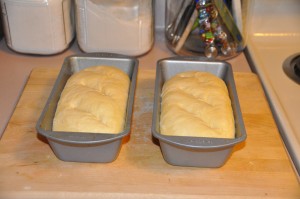
I unwrapped my dough package to discover a sticky mass of dough adhered to a towel.  After scrapping the dough off, I added more flour and shaped it into two loaves.  Based on the volume of my loaves, I used 8 x 4 loaf pans instead of the 9 x 5 loaf pans called for by the recipe.

After another 45 minutes of rising, I brushed the loaves with cold water and made some diagonal slits in the tops.

Water-Proofed Bread After Second Rising

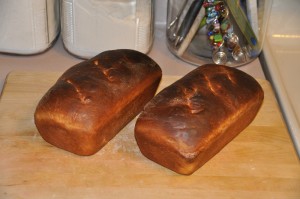
I baked the loaves at 375 degrees for 20 minutes until they were browned, then removed the loaves from the pans and baked them on the oven racks for an additional two minutes to crisp the crust.

Water-Proofed Bread

Water-Proofed Bread was my favorite recipe from the Egg Breads section to date.  It has a fluffy texture with flaky crust, and subtly buttery flavor.  I’m not sure what the whole water-proofing step actually does for you, but the end result was tasty.


Gingerbread
December 12, 2011

by stacy
Published on: December 12, 2011
Tags:No Tags
Comments: No Comments

“Many people consider gingerbread to be a cake, but it was originally meant to be a bread served at lunch or dinner with sweet butter.”
-James Beard, Beard on Bread

Since Christmas is less than two weeks away, and I needed to bake something to make up for the Pissaladiere disaster, I made Gingerbread for dinner tonight.

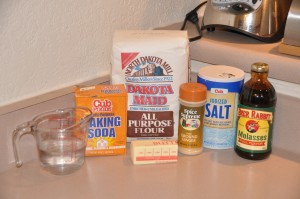
Here are the ingredients:

Gingerbread Ingredients

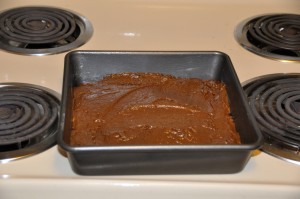
I mixed all the ingredients together and poured the batter into a greased 9 x 9 pan.

Gingerbread Before Baking

Since the batter is fairly thick, I smoothed it out with a spatula.

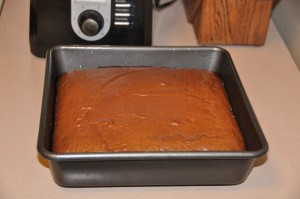
After 22 minutes in the oven at 375 degrees, the house smelled like Christmas and the Gingerbread was done.

Gingerbread

Gingerbread is a very unusual recipe.  It tastes nothing like the little man-shaped cookies; there’s no sugar involved, so it is savory instead of sweet.  It has a rich, full-bodied flavor from the molasses, with pronounced bite from the ginger.  The texture is crumbly and moist.  Mike and I agreed that it was delicious, but it has such a distinct flavor that it would be tricky to pair food with it (we ate it with grapes and cheese).

The best part about this bread?  How incredible it smells!  Three hours after pulling the bread out of the oven, my house still smells like a North Pole bakery.  I feel downright merry.

Pissaladiere
December 12, 2011

by stacy
Published on: December 12, 2011
Tags:No Tags
Comments: 2 Comments

“This is one form of the Provencal version of pizza.  It calls for tomatoes, pureed onions, anchovies, and ripe olives and is baked using a brioche dough or a plain white bread dough.”
-James Beard, Beard on Bread

“I don’t really like the anchovies…or the olives…or the onions.”
-Mike

Last Friday, I tackled a recipe that I have been dreading for a long time: Pissaladiere.  I’m not particularly fond of anchovies, olives, or masses of onions, so the combination thereof failed to enthrall me.

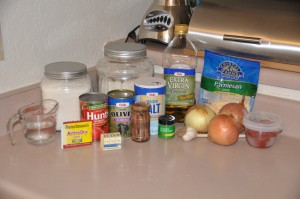
Here are the ingredients:

Pissaladiere Ingredients

Since I didn’t like the Brioche Bread recipe, I used Basic White Bread dough for my crust.  Basic White Bread is the first recipe that I tried in Beard on Bread, and I felt nostalgic as I mixed up the dough.  I have come a long way since I started this project almost nine months ago.

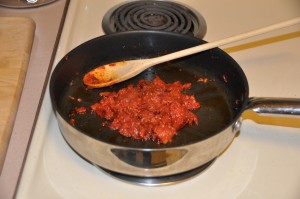
While my dough rose, I made tomato paste (I used canned tomatoes with two tablespoons of tomato paste instead of fresh tomates):

Pissaladiere Tomato Paste

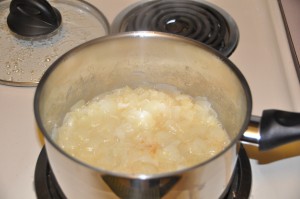
and made an onion puree:

Pissaladiere Onion Puree

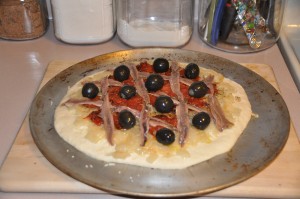
Then I rolled my dough out into a circle, place it on my pizza pan, and topped it with Parmesan cheese, the tomato paste, the onion puree, anchovies, and olives.

Pissaladiere Before Baking

It was at this point that I started to have some serious misgivings about the final product. Other than the bread dough and the Parmesan cheese, there didn’t seem to be any redeeming features to this bread.  However, it was too late to turn back: this was loaf number 70 of the Brooks Bakes Bread project, and I needed to see this recipe through.

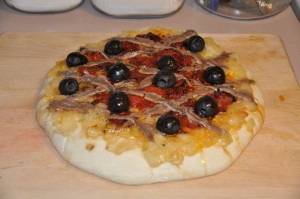
After 25 minutes in the oven at 375 degrees, dinner was ready.

Pissaladiere

The good news?  I managed to complete this recipe and cross it off my list.  The bad news?  I thought Pissaladiere was absolutely disgusting.  I tried to like it.  I ate my way through two pieces as Mike somehow made his way valiantly through three pieces.

“You know what?  I don’t really like this at all,” I said, as I stared down at the mess of anchovies and olives.  “I mean, I really, really don’t like this.  I think I’m going to throw the whole thing in the garbage.”

“It’s not too bad.  But I don’t really like the anchovies…or the olives…or the onions,” said Mike.

So the Pissaladiere ended up in the garbage, and Mike went out and bought some Chardonnay, and we had wine and pretzels for dinner.  It was a vast improvement over the original plan.


Rye Bread
December 5, 2011

by stacy
Published on: December 5, 2011
Tags:No Tags
Comments: No Comments

“A pleasant rye bread of good texture and interesting flavor.  It is rather difficult to make but worth the trouble.”
-James Beard, Beard on Bread

Between Thanksgiving, a knitting retreat, three different out-of-town Christmas celebrations, and Christmas cookies, I don’t foresee a lot of bread baking getting done over the next few weeks.  Yesterday I managed to squeeze in Rye Bread, and I’m glad I did.  Somewhere between kneading the dough and chewing my way through a gloriously textured slice, the hectic pace of my life slipped away.

Here are the ingredients:

Rye Bread Ingredients

One minor adjustment: instead of a “heaping” tablespoon of salt I used a level tablespoon.  The container is full of rye flour from the co-op.

Despite Beard’s rather ominous comments about this bread being “difficult to make” I had the opposite experience.  My dough kneaded up nicely, rose quickly, and baked beautifully.  Please don’t bother with the allegedly “easy to prepare” and completely convoluted Pronto Pumpernickel recipe–just make this one.

My only snag was the misjudgement I made when dividing the dough, which resulted in one loaf that was quite a bit larger than the other.

Rye Bread After Second Rising

After a baking time of only 30 minutes at 400 degrees, I pulled two gorgeous loaves out of the oven.  The texture of the bread was perfect thanks to the egg white wash I brushed over the loaves: crunchy on the outside and soft and chewy on the inside.

Rye Bread

This is a winning recipe.  Rye Bread is straightforward to prepare and results in a lovely, basic loaf of bread.


page 1 of 1

104


0

Loaves baked   Loaves to go
About the Baker
I'm a paralegal living and working in the Minneapolis-St. Paul metro area. Besides baking, blogging, and eating bread, I love knitting and enjoying the Minnesota outdoors. My husband, Mike, is the Brooks Bakes Bread website developer, bread photographer, and chief taste tester.
December 2011
S M T W T F S
« Nov   Jan »
 123
45678910
11121314151617
18192021222324
25262728293031
Recent Comments

Welcome , October 14, 2023