After one year and 104 recipes, I finished the Brooks Bakes Bread Project on March 27, 2012. You can still find me baking and cooking at my new blog, Tangled Up In Food.

Categories: Basic Yeast Bread and Other White-Flour Breads

Sourdough Bread
March 27, 2012

by stacy
Published on: March 27, 2012
Tags:No Tags
Comments: No Comments

“Despite my own feeling that sourdough bread is much overrated and is difficult to perfect at home, I am including one recipe in this collection because interest in the subject is so tremendous…Certainly it is just as unpredictable as Salt-Rising Bread, and I am not sure it is worth the trouble.  I would much rather have you spend your time producing the Buttermilk White Bread or some of the rye breads.  But for those who like a challenge, here it is.”
-James Beard, Beard on Bread

Exactly one year ago, I started the Brooks Bakes Bread project.  Today, after a week-long process of creating a starter, I baked my final recipe: Sourdough Bread.  Thanks to Beard’s warnings, I put this one off until the very end.

Last Monday evening (March 19), I mixed milk, water, sugar, salt, and flour together to form a starter.  By Wednesday morning, the starter was bubbling and smelled noxious (Beard warns “if it really takes, it can drive you right out of the room” and he wasn’t kidding) and I mixed in yeast and more water.

Every morning, holding my breath, I’ve been stirring the starter.  According to Beard, “It will continue to smell to high heaven.”  Since our lease ends at the end of the month, our apartment was shown several times over the past week.  I feel a bit self-conscious about people’s impression of my housekeeping!

Last night, I created a sponge by combining one cup of starter with more water, sugar, salt, and flour.  After letting it rise for nearly a day, I finally began preparing my dough tonight.

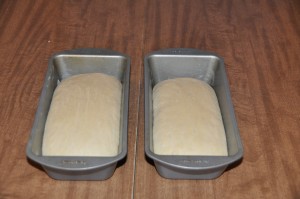
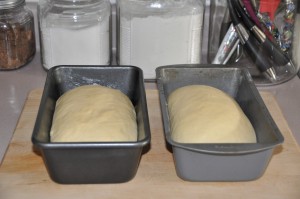
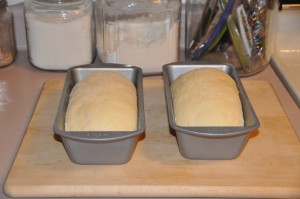
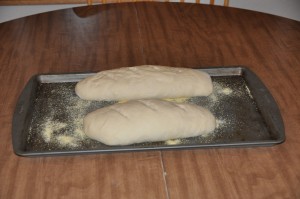
I mixed still more water, yeast, and flour into the sponge, and kneaded the dough with more flour until I made a firm dough.  After one and a half hours, I punched down the dough and then let it rise again for 45 minutes.  Then I shaped the dough into two French-style loaves and let it rise for a third time for another 45 minutes.

Sourdough Bread After Third Rising

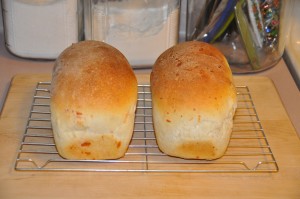
I baked the loaves at 400 degrees for 30 minutes, with a pan of boiling water on the lower rack of the oven.

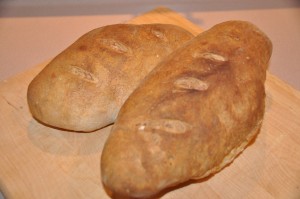
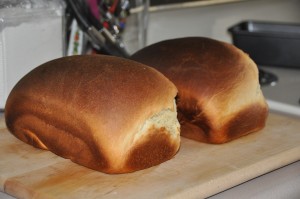
Sourdough Bread

My loaf shaping skills still need a little work, but I ended up with two respectable loaves of Sourdough Bread.  My final recipe was a success: Sourdough Bread is surprisingly mild for how pungent the starter smelled, and the crust was amazing.

After a year of baking bread, I no longer would describe myself as a novice bread maker.  I’ve tried everything from doughnuts to flat bread topped with lamb, and developed my skills along the way.

What I love about bread (and what I suspect James Beard loved too) is that you can make a fairly decent loaf on your first try, but you can spend a lifetime perfecting it and trying infinite variations.  My bread baking will go on a hiatus for now, while I finish house renovations, settle into a new job, and eat down the impressive stash of bread in the freezer.  But I know that I will always come back to baking bread, however life unfolds.  In the words of James Beard, “There is no smell in the world of food to equal the perfume of baking bread and few greater pleasures in eating than sitting down with a slice of freshly baked bread, good butter, and a cup of tea or coffee.”

Thank you to everyone who has followed along and provided encouragement along the way.  And most of all, thanks to Mike for always believing in me and even more importantly, helping me eat all of that bread!

Salt-Rising Bread
March 26, 2012

by stacy
Published on: March 26, 2012
Tags:No Tags
Comments: No Comments

“You may try the same recipe [for Salt-Rising Bread] without success three or four times and find that it works the fifth time. Or you may get a loaf that is halfway good. If it works, fine; if it doesn’t, forget it. I am including it in this collection because it is a worthy recipe, but I do so with a warning that you may be disappointed.”
-James Beard, Beard on Bread

Because I am caught up in the stress-inducing situation that is home renovations while switching jobs, I am a week behind posting this. However, I have been working on my sourdough starter for the Brooks Bakes Bread Grand Finale tomorrow.

Salt-Rising Bread turned out to be one of my biggest failures of my Brooks Bakes Bread project. The idea behind salt rising bread is that you cultivate wild yeast to make your bread rise. However, yeast turns out to be wily for a one-celled organism. To sum it up briefly, because I am incredibly tired:

1) I made a starter using a potato, and let it sit in a warm water bath in my slow cooker for nearly 24 hours. The temperature was a steady 100 degrees.

2) Nevertheless, my starter failed to foam at all. Instead of giving up, I moved to Plan B:

Salt-Rising Bread After Rising

Plan B: Add yeast to your “yeast free” bread to ensure that it rises.

3) I ended up with a decent loaf of bread, although it wasn’t Salt-Rising Bread.  It had a nice even crumb and a slightly cheesy flavor from the starter.

Salt-Rising Bread

Plain Saffron Bread
March 19, 2012

by stacy
Published on: March 19, 2012
Tags:No Tags
Comments: 2 Comments

“This bread is reminiscent of Cornish and Welsh teas, where saffron buns and bread have been exceedingly popular for generations…It makes fine toast.”
-James Beard, Beard on Bread

“No offense to you or your cooking, but I think it tastes like water out of a garden hose.”
-Mike, who discovered he doesn’t like saffron

My life has taken on a hectic place.  We spent the first full week in March at Walt Disney World (bread notes: try the croissants in France and the sandwiches in Norway at the Epcot World Showcase).  Since coming back, I’ve gotten a new job, and we have started work on our new house.  So even though I baked Plain Saffron Bread last Tuesday, I’m just getting around to posting now.

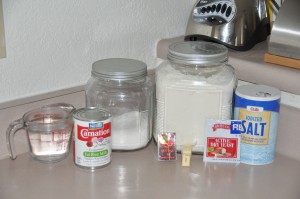
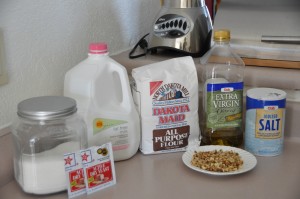
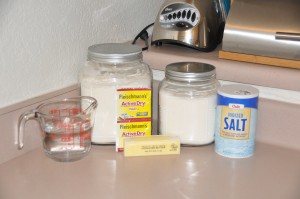
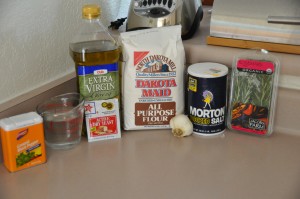
Here are the ingredients:

Plain Saffron Bread Ingredients

Saffron is expensive–the little box of saffron threads from the bulk spice section was $10, and this recipe used most of it.

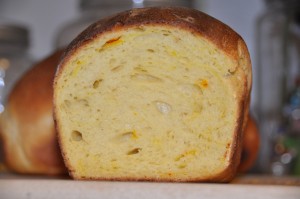
I started by steeping my saffron in boiling water.  Meanwhile, I proofed the yeast with sugar and warm water.  At the same time, I scalded the milk, adding the butter and salt.  Once the milk mixture had cooled, I combined everything in a large bowl and added the flour.  My dough kneaded up to be a yellow color with a softly elastic texture.

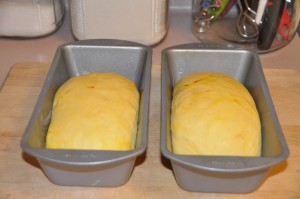
I let the dough rise twice before shaping into two loaves to fit my 8 x 4 loaf pans, and then I let those rise again.  Each rising took about 45 minutes.

Plain Saffron Bread After Second Rising

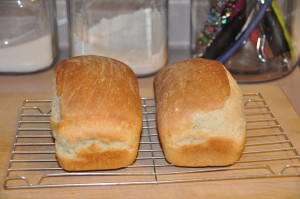
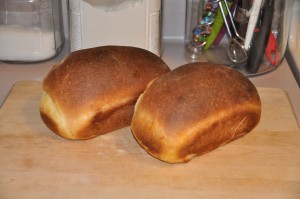
I baked the bread at 425 degrees for ten minutes and then finished it off at 350 for 20 minutes.

Plain Saffron Bread

You have to really like saffron to enjoy this bread.  Mike really didn’t think much of it (he compared it to drinking water out of a garden hose) and I wasn’t a huge fan of it fresh from the oven.  But sliced thin and toasted, Plain Saffron Bread is sublime.  The toasting makes the saffron flavor more subtle, and it crisps to the perfect texture.  It was definitely some of finest–and most expensive–toast that I’ve ever had.

Plain Saffron Bread

Jane Grigson’s Walnut Bread from Southern Burgundy
February 25, 2012

by stacy
Published on: February 25, 2012
Tags:No Tags
Comments: No Comments

“This recipe comes from a delightful cookbook called Good Things by an English writer, Jane Grigson…It makes one of the most attractively flavored and textured breads I have eaten in a long time.”
-James Beard, Beard on Bread

In an effort to make my March 27 deadline, I am doing three recipes this weekend.  The first is Jane Grigson’s Walnut Bread from Southern Burgundy.

Here are the ingredients:

Jane Grigson's Walnut Bread from Southern Burgundy Ingredients

Since I couldn’t find walnut oil, I substituted olive oil, and I left out the chopped onion since I didn’t really like it in Dill-Seed Bread.

I mixed all of my ingredients, except the walnuts, together to form a nice soft dough that was a pleasure to work with (especially after Gluten Bread).

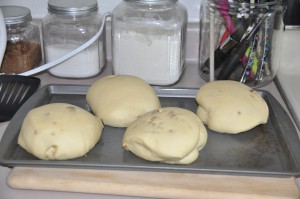
Although the recipe indicates a rising time of two hours, my dough tripled in size after an hour and half, so I punched it down and kneaded in the chopped walnuts.  Then, I shaped it into four round loaves and let it rise for another 45 minutes.

Jane Grigson's Walnut Bread from Southern Burgundy After Second Rising

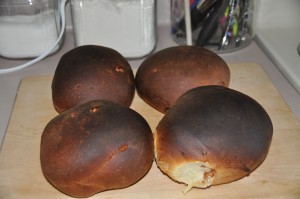
I baked the loaves at 400 degrees for 40 minutes.  They ended up a bit over-browned, so I probably could have shorted the baking time a few minutes.

Jane Grigson's Walnut Bread from Southern Burgundy

Jane Grigson’s Walnut Bread from Southern Burgundy is absolutely lovely.  Personally, I think it tasted wonderful without the onions and a subtle hint of olive oil.  The texture is perfect: a thick, crusty exterior with an incredibly light and fluffy inside.

Gluten Bread
February 25, 2012

by stacy
Published on: February 25, 2012
Tags:No Tags
Comments: 3 Comments

“Making [Gluten Bread] is a fascinating lesson in what gluten does: the dough will resist you when you knead, will try to contract when you spread it out, but the resulting loaf is worth the battle.”
-James Beard, Beard on Bread

On Wednesday, I made Gluten Bread, which will go the list of bizarre bread recipes along with English Muffin Bread for Microwave Oven.  The unique thing about Gluten Bread is that it uses gluten flour, which is typically added to whole-grain breads in small quantities to improve the texture.

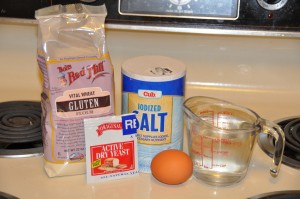
Here are the ingredients:

Gluten Bread Ingredients

I mixed my ingredients together and then attempted to knead the dough.  Since the dough, quite literally, had the same texture as well-chewed gum, this proved to be a near impossible undertaking.  It also had an unpleasant brown color that made it look dirty, and I think I would have had more success shaping a rubber tire into a loaf of bread than this dough.

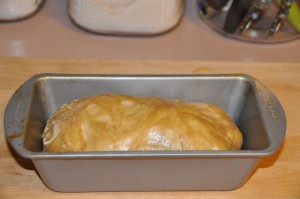
Anyway, I finally formed what is most definitely the ugliest loaf that I have ever made, and let it rise for about an hour and a half.

Gluten Bread After Rising

See?  I wasn’t kidding about the ugly thing.

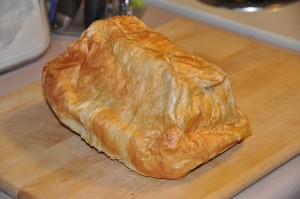
The recipe instructed me to bake the bread at 350 degrees for 50 to 60 minutes.  After 25 minutes, I noticed a burning smell and checked on the bread to find this:

Gluten Bread in Oven

I poked the bread with a knife to deflate some of air (at this point remembering that I was supposed to slash the top of the loaf before baking–oops) and used a heat resistant spatula to detach the dough from the broiler.

Gluten Bread

Before investing more effort into a loaf that was shaping up to be a disaster, I sampled a slice of gluten bread off of the end.  It had the texture of a popover, assuming said popover is made of rubber.  The taste wasn’t much better, and in fact was reminiscent of an eraser I ate as a child.  Mike described it as tasting like “a cooked rubber band with a hint of industrial chemicals.”

Gluten Bread

Needless to say, I didn’t finish baking my loaf and tossed it in the garbage.  I hate wasting food, but I honestly would not classify this bread as food.  James Beard let me down with this one.


Refrigerator Potato Bread
January 14, 2012

by stacy
Published on: January 14, 2012
Tags:No Tags
Comments: No Comments

“The potato and butter in this loaf give it a distinctive, very pleasant flavor…it is nice for sandwiches or toast or as a breakfast or tea bread, and is reminiscent of breads that used to be common in the nineteenth century.”
-James Beard, Beard on Bread

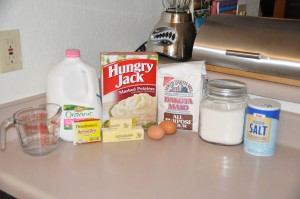
I continued my bread-with-mashed-potatoes kick today with Refrigerator Potato Bread.  The recipe can be found on the James Beard Foundation’s website.

Here are the ingredients:

Refrigerator Potato Bread Ingredients

Refrigerator Potato Bread is so named because its first rising is done overnight in the refrigerator.  Last night, I mixed up my dough (I had to use an extra 1/2 cup of flour, 6 1/2 cups total, to get the right consistency), kneaded it up, and placed it in a buttered bowl covered with plastic wrap in the refrigerator.

This morning, after a leisurely breakfast (I love Saturdays!) I pulled my dough out of the refrigerator and let it warm up for about 10 minutes.  Then, I kneaded it for a second time.  The dough was still cold and stiff from its night in the fridge, so kneading involved more manhandling than fluid technique.

I shaped the dough into loaves to fit in my 9 x 5 loaf pans, and let them rise for 3 hours.  Since I was starting with cold dough, I wanted to allow ample time for the second rising.

Refrigerator Potato Bread After Second Rising

After 40 minutes in the oven at 375 degrees, the bread was ready in time for lunch (Fresh baked bread for lunch is another reason to love Saturdays).

Refrigerator Potato Bread

Both of the loaves cracked on one side during baking; I think that if I had made some cuts in the top that would have prevented it.

Mike and I both thought Refrigerator Potato Bread was delicious.  It was somehow fluffy and moist at the same time, with a nice balance of flavors from the butter, potatoes, sugar, and salt.  We’re looking forward to making some paninis tomorrow night.


Pullman Loaf or Pain de Mie
January 10, 2012

by stacy
Published on: January 10, 2012
Tags:No Tags
Comments: No Comments

“This is the white bread frequently used for sandwiches, a four-square loaf that has delicate texture, a fine crumb, and good flavor.”
-James Beard, Beard on Bread

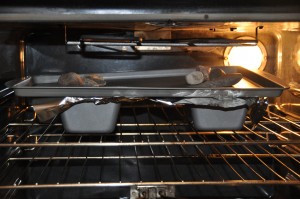
One of the tricky parts of the Brooks Bakes Bread project is finding substitutes for specialty baking equipment.  I have a small kitchen, so I don’t have the storage space to accumulate extra gadgets.  I have successfully used a slow cooker liner as a souffle mold, but was less successful when I attempted to use tuna cans for crumpet rings.  I have been brainstorming for awhile to come up with something to use in place of a Pullman tin, a bread pan with a sliding lid so that you get a square-shaped loaf.  With some brainstorming help from Mike, I set up a “Pullman tin” made up of regular bread pans covered with greased aluminum foil, weighted with a baking sheet and landscaping rocks I borrowed from the front of our apartment complex.  After figuring out my equipment, it was time to mix up the dough.

Here are the ingredients:

Pullman Loaf Ingredients

There was something very satisfying about kneading up this dough.  Beard’s recipe instructs you to “work it [the dough] hard for a good 10 minutes: slap it, beat it, punch it…” I did with gusto.

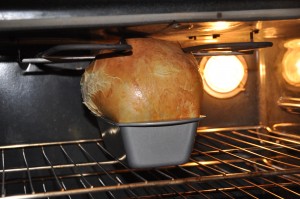
After a first rising of about 45 minutes, I kneaded the dough again for a few minutes and let it rise for another 45 minutes.  After the second rising, I shaped the dough into loaves to fit my 8 x 4 loaf pans and let the dough rise for another 30 minutes.  Finally, it was time to set up my loaves in the oven:

Pullman Loaf in Oven

I baked the loaves at 375 degrees for 35 minutes and then removed the loaves from the pans and baked them for an additional few minutes.

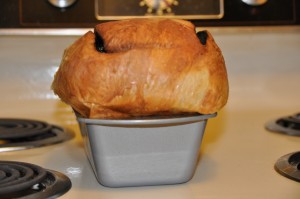
Pullman Loaf

My improvised Pullman Loaf tin didn’t quite give me a square loaf: the rocks weren’t heavy enough, and I had too much dough for the size of pans.  However, my Pullman Loaf was still absolutely delicious: incredibly light and buttery, with a flaky crust that was reminiscent of a saltine cracker.  When I get a better kitchen, I might even invest in a Pullman tin.

Sour-Cream Bread
November 19, 2011

by stacy
Published on: November 19, 2011
Tags:No Tags
Comments: 2 Comments

“This is a very rich bread with a slightly acid flavor and a wonderful texture.  I invented it one day when I set out to make buttermilk bread and didn’t have any buttermilk.  I resorted to sour cream instead, and the results were highly satisfactory.”
-James Beard, Beard on Bread

Continuing on my sour cream kick (it was on sale) I made Sour-Cream Bread tonight.  Today was our first snowfall of the season, so it was a perfect night to stay in.

Here are the ingredients:

Sour-Cream Bread Ingredients

This recipe took a bit longer than anticipated because the sour cream is supposed to be at room temperature, so everything was delayed by an hour while the sour cream sat on the counter.  Otherwise, this was fairly straightforward recipe to prepare.  The dough was a challenge to work with; the sour cream made it extremely soft, but at the same time very  crumbly.  It took a lot of elbow grease and patience to knead the dough to the point where it stayed together.

After the first rising, I didn’t have enough dough to shape into 9 x 5 loaves, as called for by the recipe, so instead I used my 8 x 4 pans.  I was so anxious to get the bread in the oven that I forgot to take a “before” picture, but here is the “after” picture when the bread came out of the oven after 20 minutes at 375 degrees:

Sour-Cream Bread

Sour-Cream Bread is definitely not a bread I would make again.  It is very rich and heavy; I prefer my white breads to have a light texture. However, it was still lovely to eat soup and fresh bread and watch the snow fall, and bask in the appreciation of not having to shovel any of it since we live in a townhouse.

Cheese Bread
September 26, 2011

by stacy
Published on: September 26, 2011
Tags:No Tags
Comments: No Comments

“This rather unusual bread is delicate and moist, with an intriguing cheese bouquet and flavor.”
-James Beard, Beard on Bread

Mike requested some sandwich bread for the week, so last night I made Cheese Bread.

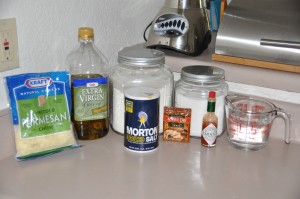
Here are the ingredients:

Cheese Bread Ingredients

I used two of Beard’s variations suggestions: I substituted 1/3 cup olive oil for the 1/2 cup of butter, and used one cup of shredded Parmesan instead of a mixture of Parmesan and Gruyere.

The recipe starts out like a basic white bread dough: I mixed all of the ingredients except the cheese together to form a dough, kneaded the dough, and let it rise for two hours.  Then I had to knead in the cheese.  Luckily, it was much easier to knead shredded cheese into bread dough than it is to knead in an entire stick of butter.

I shaped the dough into two loaves to fit my 8 x 4 bread pans and let the dough rise for another hour and a half.

Cheese Bread After Second Rising

I baked the loaves at 375 degrees for 20 minutes; they increased in size fairly dramatically during baking.

Cheese Bread

Cheese Bread is amazing–it is a perfect loaf of basic white bread, blended with subtle flavors of Parmesan and olive oil.  Half of one loaf disappeared fresh from the oven; the other half lasted another 12 hours.  Cheese Bread is going on my “favorites” list.

Pizza Caccia Nanza
August 28, 2011

by stacy
Published on: August 28, 2011
Tags:No Tags
Comments: No Comments

“The literal translation of ‘caccia nanza’…is ‘take out before.’  When bread was made in traditional Italian households a bit of dough was reserved to make a pizza.  The pizza was placed in the oven with the bread and obviously cooked more quickly.  It was ‘taken out before’ the bread, hence the name…This is the only garlic bread I have ever eaten in Italy.”
-Edward Giobbi, Italian Family Cooking, as quoted by James Beard, Beard on Bread

Pizza Caccia Nanza is a unique recipe in Beard on Bread: a flat loaf of bread flavored with garlic and rosemary.  I’ve been looking forward to baking it since I started my project, and finally got around to it yesterday.

Here are the ingredients:

Pizza Caccia Nanza Ingedients

The dough is a very basic white bread dough, with only flour, yeast, salt, and water.  After combining all of the ingredients (I had to add an extra teaspoon of water to make the dough hold together), I kneaded the dough and let it rise for one hour and 15 minutes.  Then I kneaded the dough again, and let it rise for an additional 45 minutes.

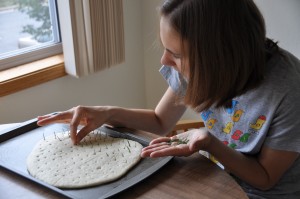
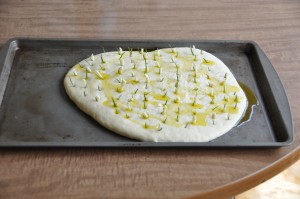
Next came the interesting part: instead of shaping the dough into a loaf, I rolled it out flat and made dozens of tiny indentations in it with the tip of a knife.  I had to place a sprig of rosemary into each indentation.  It was a tedious process.

Placing Rosemary in Pizza Caccia Nanza

After I finished with the rosemary, I cut two cloves of garlic into thin slivers and placed all of the slivers into the indentations as well.  By this point, I realized that  1) I could never work on an assembly line, and 2) the bread would have to be pretty tasty to be worth the effort.  I drizzled the finished loaf with olive oil and sprinkled it with salt and pepper, and it was ready for the oven.

Pizza Caccia Nanza Before Baking

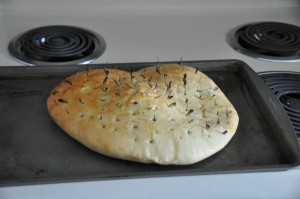
After 15 minutes, the loaf was golden-brown.

Pizza Caccia Nanza

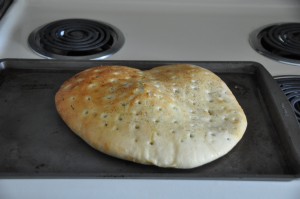
Before eating the bread, I had to remove all the rosemary and garlic that I had placed so carefully.  Luckily, the smell of fresh bread lured Mike downstairs and he helped me out.

Pizza Caccia Nanza

Then came the moment of truth: did all of the time and effort result in a delicious loaf?  The answer: definitely yes!  Pizza Caccia Nanza has a wonderful light, chewy texture, with a tender crust.  The flavors of rosemary and garlic blend together throughout the loaf, giving it a delightful flavor.  The highest praise came from Mike, as we polished off the loaf together.

“You know, this tastes like something that you would pay a lot of money for in a really expensive restaurant.”

Victory!

page 1 of 2

104


0

Loaves baked   Loaves to go
About the Baker
I'm a paralegal living and working in the Minneapolis-St. Paul metro area. Besides baking, blogging, and eating bread, I love knitting and enjoying the Minnesota outdoors. My husband, Mike, is the Brooks Bakes Bread website developer, bread photographer, and chief taste tester.
October 2023
S M T W T F S
« Mar    
1234567
891011121314
15161718192021
22232425262728
293031  
Recent Comments

Welcome , October 14, 2023