After one year and 104 recipes, I finished the Brooks Bakes Bread Project on March 27, 2012. You can still find me baking and cooking at my new blog, Tangled Up In Food.

Archives: April 2011

Cinnamon Bread
April 27, 2011

by stacy
Published on: April 27, 2011
Tags:No Tags
Comments: No Comments

I love the idea of cinnamon bread, but it seems like all of the commercially produced versions have raisins in them.  I am not a big raisin fan.  This dates back to an incident in my childhood when I bit into what I thought was a chocolate chip cookie and was crushed to get I got a mouthful of raisins instead of chocolate.  Beard’s cinnamon bread recipe doesn’t have any raisins in it, so I was excited to try it.

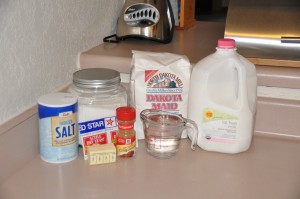
Here are the ingredients:

Cinnamon Bread Ingredients

I didn’t realize until I was measuring it out that the tablespoon of cinnamon called for in the recipe is a considerable amount of cinnamon.  You could smell it all the way on the second floor of our townhouse.

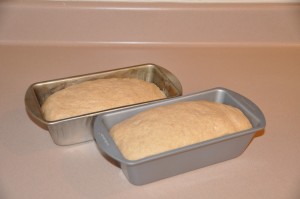
I added about 4 1/4 cups of flour to my dough, and then kneaded in an additional 1/4 cup of flour.  After the first rising, this yielded enough dough for two 8 x 4 loaves.

Cinnamon Bread After Second Rising

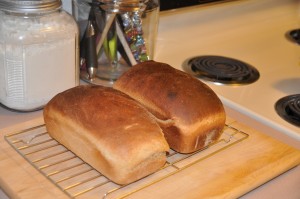
The strong cinnamon aroma that wafted through the house as the bread baked was delicious.  I baked the loaves at 425 degrees for 10 minutes, and then 350 degrees for 15 minutes.  The top of one of the loaves was starting to get a bit over-browned when I pulled it from the oven.

Cinnamon Bread

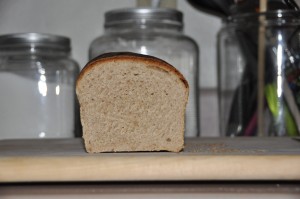
Since I didn’t finish baking until 10:30 last night, I sampled the bread for breakfast.  As expected, the cinnamon flavor was very pronounced, but the bread was not overly sweet–there was only 1/3 cup of sugar between the two loaves.  It was delicious fresh, and it should make wonderful toast as well.  And the best part?  Not a raisin in sight!

Cinnamon Bread

Whole-Wheat Bread Made with Hard-Wheat Flour
April 23, 2011

by stacy
Published on: April 23, 2011
Tags:No Tags
Comments: 2 Comments

Since I have been making mainly white-flour breads, I decided it was time to branch out into some of the whole-wheat recipes.  I chose Whole-Wheat Bread Made with Hard-Wheat Flour as a good basic recipe to start with.

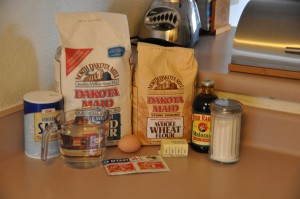
Here are the ingredients:

Whole-Wheat Bread Made with Hard-Wheat Flour Ingredients

The recipe calls for three cups of whole-wheat flour and two cups of hard-wheat, or bread, flour.  The whole-wheat flour behaved differently compared to the all-purpose flour that I’ve been using: the dough was much softer and more pliable; I had to use the entire recommended amount of flour (usually I need to reduce it by at least one-half cup); and my rising time was much longer (usually my rising time is half that called for by the recipe).  This bread was also different in that it uses molasses as a sweetener.

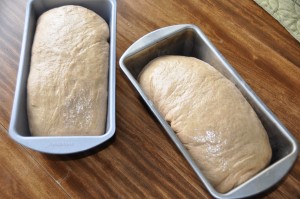
Beard isn’t overly specific as to how many loaves the recipe makes–he states that you can shape it into one free form loaf, two 8 x 4 loaves, or two 9 x 5 loaves.  Based on the volume of dough after the first rising, I used two 8 x 4 loaf pans.

Whole-Wheat Bread Made with Hard-Wheat Flour After Second Rising

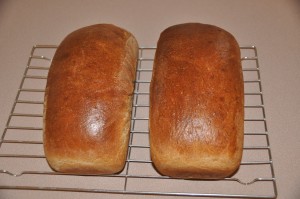
The 8 x 4 loaf pans were definitely the right choice–after the second rising, it was clear that there wasn’t enough dough to fill two 9 x 5 pans.  Beard comments that this bread “has a lovely smell when baking and cooling,” and it certainly does–a very pronounced aroma of molasses and whole-wheat.

Whole-Wheat Bread Made with Hard-Wheat Flour

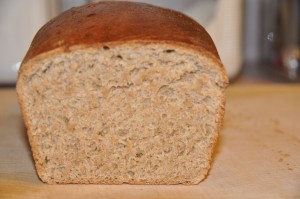
Despite the wonderful molasses aroma, we couldn’t taste any molasses in the finished bread.  However, it was savory and delicious, with a pleasantly soft and chewy texture.

Whole-Wheat Bread Made with Hard-Wheat Flour


Baking Powder Biscuits
April 18, 2011

by stacy
Published on: April 18, 2011
Tags:No Tags
Comments: 1 Comment

“Certainly no bread in America has been more popular over a longer time than baking powder biscuits.”
-James Beard, Beard on Bread

“I love these biscuits.”
-Mike

I try to bake two recipes a week, one during the week and one on the weekend.  Weeknight baking can be tricky, since there isn’t enough time between getting home from work and dinner for dough to rise–unless we eat dinner after 9:00 pm.  Baking powder biscuits are the perfect weeknight bread: minimal ingredients, easy prep, and a short baking time.  Oh, and they’re pretty delicious to boot.  The recipe can be found on the James Beard Foundation’s website.

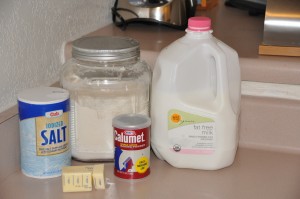
Here are the ingredients, all five of them:

Baking Powder Biscuits Ingredients

Beard recommends using two knives or a heavy fork to cut the butter into the flour mixture.  I had excellent results using my pastry blender.

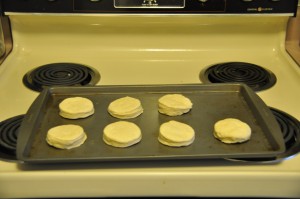
Even after adding the milk, my dough was still too dry to hold together, so I kneaded 2 teaspoons of water into the dough.  I rolled the dough out to a half-inch thickness, as recommended for “very high, fluffy biscuits” (who in their right mind would want a thin, crispy baking powder biscuit anyway?).  Since I used a large round cookie cutter, the recipe only yielded seven biscuits instead of twelve.

Baking Powder Bisuits Before Baking

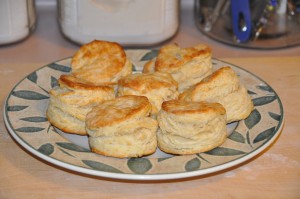
I baked the biscuits for ten minutes, at which point they were a beautiful golden color and were exploding with fluffiness.

Baking Powder Biscuits

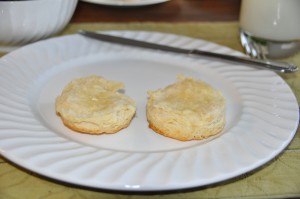
The biscuits were absolutely incredible.  The texture was perfect: browned but not too crisp on the outside, fluffy layers on the inside.

Baking Powder Biscuit

Bearing in mind the horrendous stomachache I got last week from consuming two-thirds of my batch of pancakes, and since the biscuits were fairly massive, I limited myself to only two.  It required epic willpower.


Yeast Griddle Cakes or Pancakes
April 15, 2011

by stacy
Published on: April 15, 2011
Tags:No Tags
Comments: No Comments

Since I’m a practicing Catholic, Mike and I have meatless dinners during Lent.  This isn’t a very big deal for us, since at least half of our recipes are meatless anyway.  However, Lent does give me an excuse to make one of my favorite meatless meals–breakfast for dinner.  We very rarely make big breakfasts like French toast or omelets.  In my opinion, these make excellent dinner options.  Mike is skeptical, but he humors me.

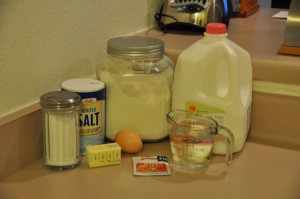
Tonight’s dinner was Yeast Griddle Cakes.  Here are the ingredients:

Yeast Griddle Cakes Ingredients

The recipe calls for making the starter the night before.  Since I was making these for dinner, I began the starter in the morning.

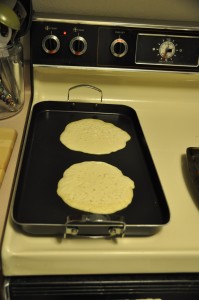
Yeast Griddle Cakes

The batter was a little lumpy, and my pancakes were asymmetrical and not very aesthetically pleasing.  However, these were the absolute best pancakes that I’ve ever tasted.  The starter gives them a slight sourdough flavor, and they were incredibly light and fluffy.  After tasting these, I don’t think that I will ever be able to go back to pancake mix!

Graham Bread
April 12, 2011

by stacy
Published on: April 12, 2011
Tags:No Tags
Comments: 2 Comments

I couldn’t have created this blog without my husband, Mike.  He is my website developer, food photographer, and chief taste-tester.  Most importantly, when I told him that I wanted to spend the next year baking all of the recipes from Beard on Bread, he didn’t say, “Why would you do a crazy thing like that?” or “We really don’t need all that bread…”  Instead, he (and this is why he’s the perfect husband for me) said, “Cool!  That means I get to eat lots of homemade bread!”

Anyway, to thank him for all of his contributions to the Brooks Bakes Bread Project, I promised to bake a recipe of his choosing this week.  After perusing the cookbook, he chose Graham Bread.

All I know about graham flour is that presumably it’s used to make graham crackers, and I planned on driving all over the greater Minneapolis-St. Paul metro area in search of a specialty baking store that carried it.  Actually, my local grocery store carries Bob’s Red Mill Organic Graham Flour in the regular baking aisle, right next to the yeast.

Here is the graham flour with the rest of the ingredients:

Graham Bread Ingredients

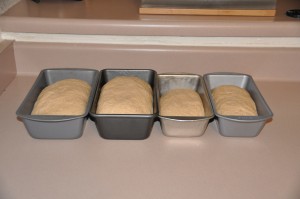
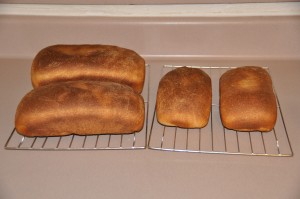
This recipe makes a lot of dough–the recipe calls for three cups of graham flour and five to six cups of all-purpose flour. I got my dough to the right consistency with about four and one-half cups of all-purpose flour. I let the dough rise for 50 minutes, at which point it had exploded out of the bowl I put it in. The recipe yields three 9 x 5 loaves of bread; since I only have two 9 x 5 loaf pans, I made two 9 x 5 loaves and two 8 x 4 loaves.  I let the dough rise in the pans for about one hour.

Graham Bread Dough after Second Rising

As called for by the recipe, I baked all four loaves at 425 degrees for 10 minutes. Then I turned the oven down to 350 degrees and baked the 8 x 4 loaves for an additional 25 minutes and the 9 x 5 loaves for an additional 30 minutes.

Graham Bread

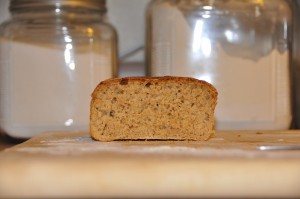
The verdict? The bread certainly doesn’t taste like graham crackers–there isn’t enough sugar for that. The graham flour provided some of the nutty flavor of a whole wheat flour, but with a much lighter taste and texture.

Graham Bread

I put two of the loaves in the freezer, since we learned from last week’s massive challah loaves that there is a limit to how much bread two people can eat. We ate some fresh out of the oven (of course), we had challah for dinner on Thursday, I had a challah grilled cheese on Friday, and we both had challah grilled cheeses on Saturday. There was still half a loaf left, so I resorted to making Melba toast and croutons. We did use it all up, but I don’t think that I can look at another challah braid for a few months.

French-Style Bread
April 9, 2011

by stacy
Published on: April 9, 2011
Tags:No Tags
Comments: 1 Comment

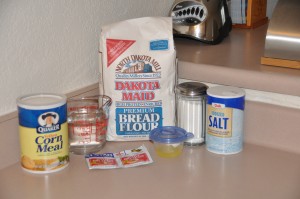
In the “Observations” section of Beard on Bread, Beard recommends using North Dakota hard wheat flour (now more commonly known as bread flour).  Since I live in the neighboring state of Minnesota, my grocery store sells a regional brand of North Dakota milled flour, Dakota Maid by the North Dakota Mill. I finally used up all of store-brand flour all-purpose flour I had on hand last week, and so I bought a 10 pound bag of bread flour and a 5 pound bag of all-purpose flour. As my flour rolled down the checkout lane conveyor belt, the woman in the lane next to me loudly exclaimed, “Oh my God! That’s a LOT of flour!” to no one in particular. Well, yes, it is a lot of flour, but I’m making a lot of bread. Today’s recipe: French-style Bread.

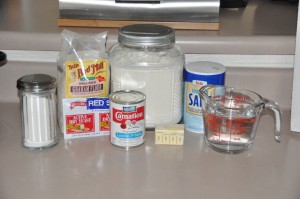
The Ingredients:

French-Style Bread Ingredients

The Challah Bread I made on Wednesday called for egg yolk mixed with water to glaze the top of the loaf; French-Style Bread calls for glazing the loaf with an egg white mixed with water. I saved the egg white from the Challah Bread (in the little container in front) because I hate wasting anything.

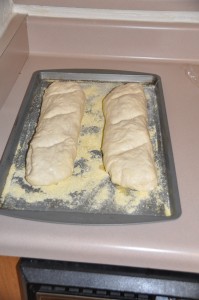
I couldn’t get my bread dough to hold together after adding 5 cups of flour, so I added an extra tablespoon of water. That seemed to do the trick. My rising time was only 45 minutes, and then I shaped the dough into approximations of French bread loaves:

French-Style Bread Loaves Before Baking

My dough shaping skills definitely need work. I checked on the loaves after 25 minutes in the oven, and they were already done.

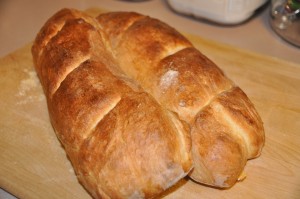
French-Style Bread


French-Style Bread

So how did the bread taste? Well, between 9:00 am this morning, when I pulled the bread out of the oven, and 6:00 pm tonight, Mike and I seem to have devoured both loaves. Completely. Mike ate his with margarine and hummus; I had some slices with jam this morning and then switched to straight bread in the afternoon. In our defense, Beard does say that this bread “will not hold for more than half a day” so we felt compelled to enjoy it to its utmost while it was still fresh. Really, we had to.

There are some people who, if given the opportunity, will eat a whole bag of potato chips or a whole box of Girl Scout cookies. Mike and I seem to be the kind of people who can eat a whole loaf of homemade bread. Each. And it was absolutely glorious.

Challah
April 6, 2011

by stacy
Published on: April 6, 2011
Categories: Challah, Egg Breads
Tags:No Tags
Comments: No Comments

Today was a somewhat frustrating day at work, plagued by computer problems. I couldn’t wait to get home, unwind, and bake some challah. I have made challah twice before, and I love everything about it–the process of braiding it, the smell as it bakes, and the delicious taste from the hint of eggs.

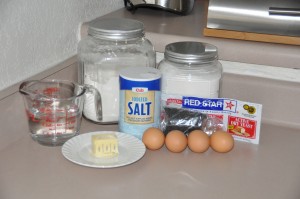
Here are the ingredients:

Challah Ingredients

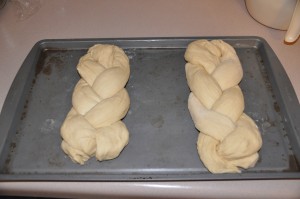
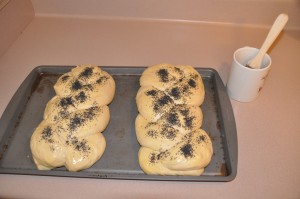
This recipe required more yeast than I have ever used, 3 packets. It does yield two loaves, but the dough seemed to rise much faster than my other challah recipe (from the Betty Crocker cookbook). Beard estimates the first rising time as 1 1/2 to 2 hours–mine was ready in only 45 minutes. I divided the dough into six not-very-equal portions with a pizza cutter. Then I spent several minutes moving bits of dough from one lump to another, moving them back again, and then holding one in each hand to try to weigh them against each other.  I recommend using a kitchen scale instead, if you’re smart enough to have one (of course, I’m not).  I finally got the portions close enough, and rolled them out and braided them.  As you can tell, one loaf ended up larger than the other due to my dough equalizing difficulties.

Challah Before Second Rising

The second rising also took 45 minutes. I brushed the loaves with egg yolk and sprinkled them with poppy seeds, unfortunately not very evenly. Tonight was not the night for consistency.

Challah After Second Rising

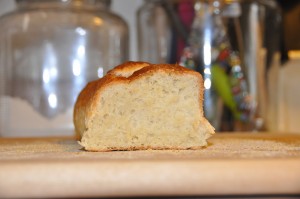
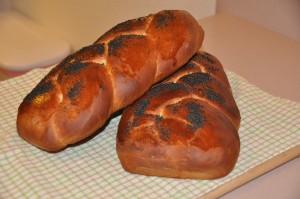
The amazing smell of challah started wafting through our house in less than 10 minutes. Unfortunately, I left the bread in the oven a bit too long. The recipe called for a minimum 35 minute baking time, so I set the timer for 30 minutes.  I checked on the loaves a few minutes early, but the crusts were already over-browned. The bread does still taste alright. However, my other challah recipe yields a much sweeter bread–1/4 cup of sugar is used for one loaf, compared Beard’s 1 tablespoon of sugar for 2 loaves. I like a sweeter challah, which preferably I haven’t over-baked. Tonight’s challah wasn’t a total loss, but I didn’t quite get the the results I had hoped for either.

Challah

Helen Evans Brown’s Corn Chili Bread
April 3, 2011

by stacy
Published on: April 3, 2011
Tags:No Tags
Comments: No Comments

Today a friend came down from Duluth and we went to the Walker Art Center. I made some chicken chili in the slow cooker for dinner paired with Helen Evans Brown’s Corn Chili Bread. I have made corn bread before, but it was of the very sweet and dry variety. In the words of Beard, this recipe is “an extremely moist, rich bread.”

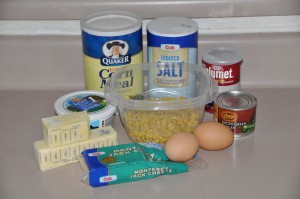
Here are the ingredients:

Helen Evans Brown's Corn Chili Bread Ingredients

Yes, this bread has 1 1/2 sticks of butter, 1 cup of sour cream, and 1/4 pound of Monterey Jack cheese. I only used 3/4 of a cup of sour cream because I forgot that an 8 ounce container is sold by weight, not by volume. This bread was so incredibly rich anyway that it didn’t make a difference.

I also substituted 1 1/2 cup frozen corn kernels (thawed) for the 3 ears of fresh corn. As I type this, I realized that this substitution was actually incorrect–one ear of corn is equivalent to 3/4 of a cup, so I should have used 2 1/4 cups. I feel a little embarrassed about that, since I have a degree in mathematics, but the bread turned out fine (it would be hard for the bread to not turn out fine, thanks to all the butter).

This was a very simple recipe to prepare–all I had to do was melt the butter and mix the ingredients together. As usual, cooking time was 55 minutes instead of one hour.

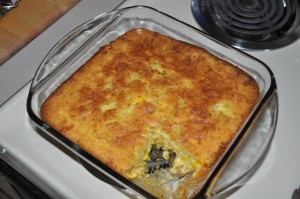
Helen Evans Brown's Corn Chili Bread

There are several words that can describe Helen Evans Brown’s Chili Corn Bread: savory, delectable, divine, and amazing spring to mind. It is so moist that you need to eat it with a fork. The chilies provide a note of spice, the melted cheese is decadent, and the buttery goodness makes for delicious forkful after delicious forkful. Beard suggests serving the bread with “plenty of butter” which would quite frankly be overkill. This bread is so rich that it eats like a main course rather than an accompaniment. Ms. Brown created a culinary masterpiece with this recipe; Mike (my husband) has ranked this bread as his favorite so far.

I am planning on eating a leftover piece of bread for lunch tomorrow, with a salad and some fruit instead of extra butter.

Banana Bread
April 2, 2011

by stacy
Published on: April 2, 2011
Tags:No Tags
Comments: 1 Comment

Since my bananas were finally ripe enough, last night was banana bread night.  I was excited to try Beard’s recipe because I love banana bread, but my only previous attempt was a disaster.  When I tried to slice it, the top crust separated from the rest of the loaf, which promptly disintegrated into banana mush.  Luckily, this attempt was more of a success.

The recipe can be found on the James Beard Foundation’s website.

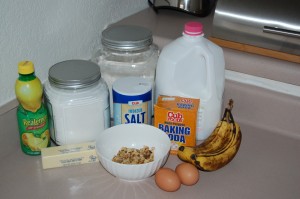
The Ingredient Picture:

Banana Bread Ingredients

I picked chopped walnuts as my nut of choice, since I still had some left over from the cheese ravioli dish.

The bread mixed up fairly easily.  I could have let the bananas ripen for another day so that I didn’t have to mash them as I mixed the bread, but I couldn’t hold out any longer.

As usual, my baking time was shorter than the recipe called for, 55 minutes instead of an hour.

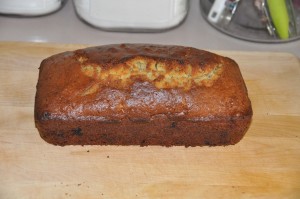
Because my non-stick loaf pan has been getting a sticky residue on it from the Crisco and butter I’ve been using to grease it, I decided to try this recipe without greasing the pan.  It was a near disaster–lesson learned, “non-stick” pans do actually have to be greased.  I was able to get the loaf out mostly intact with a knife, a large spatula, and lots of patience.

Banana Bread

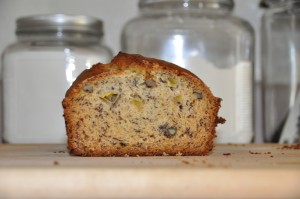
This was a much lighter-tasting banana bread than I’m used to–for me, banana bread should be very dense and moist.  This bread had a more traditional bread texture.  I prefer a richer and moister banana bread; however, my husband liked this banana bread precisely because it wasn’t as rich.  The walnuts and bananas are definitely a nice flavor combination, and the texture issue comes down to personal preference.

Banana Bread

page 1 of 1

104


0

Loaves baked   Loaves to go
About the Baker
I'm a paralegal living and working in the Minneapolis-St. Paul metro area. Besides baking, blogging, and eating bread, I love knitting and enjoying the Minnesota outdoors. My husband, Mike, is the Brooks Bakes Bread website developer, bread photographer, and chief taste tester.
April 2011
S M T W T F S
« Mar   May »
 12
3456789
10111213141516
17181920212223
24252627282930
Recent Comments

Welcome , October 14, 2023